Introduction
In this guide, we’ll walk you through setting up a guest Wi-Fi network with a hotspot portal. By the end of this tutorial, you’ll have a new Wi-Fi network that requires guests to login.
Prerequisites
Before you begin, ensure you have the following:
- Subscription details for your Uniquely.Cloud subscription.
Let’s get started
Head over to your Unifi Network Application page. Click on the Cogwheel icon on the left followed by WiFi. You should see the screen shown below.
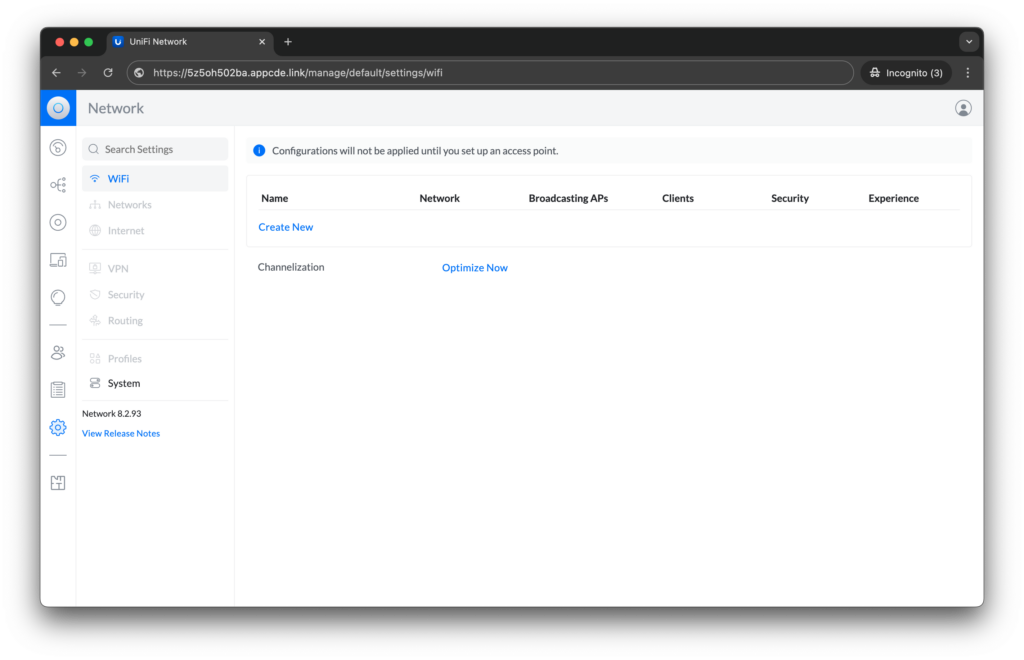
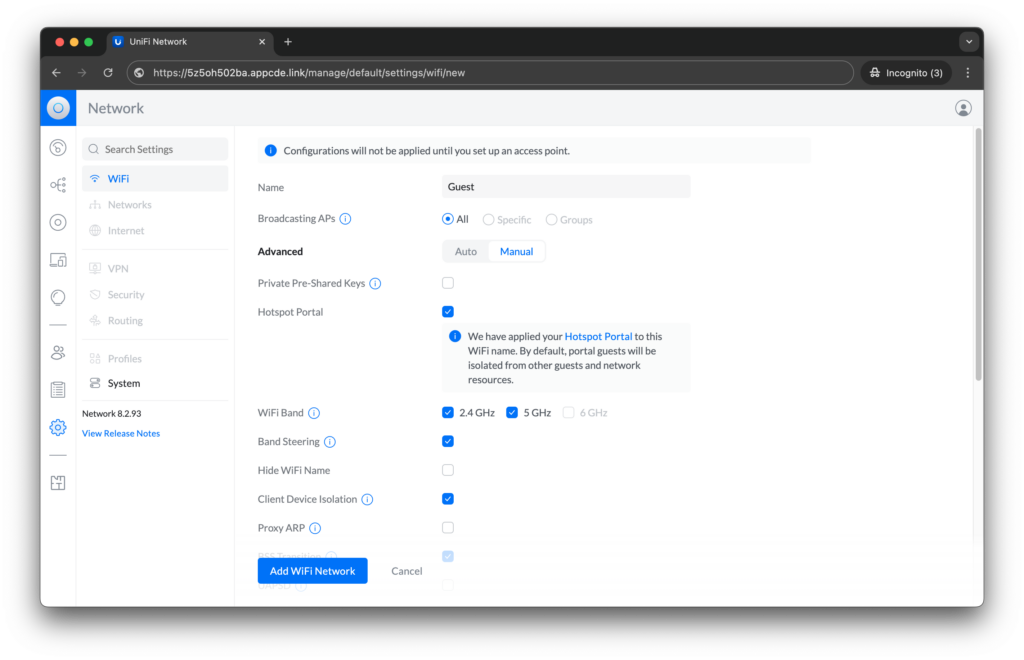
Click Create New to create a new Wi-Fi network.
- Enter a name for your Wi-Fi network, we have entered “Guest” for example
- Under Advanced click Manual
- Ensure Hotspot Portal is Checked
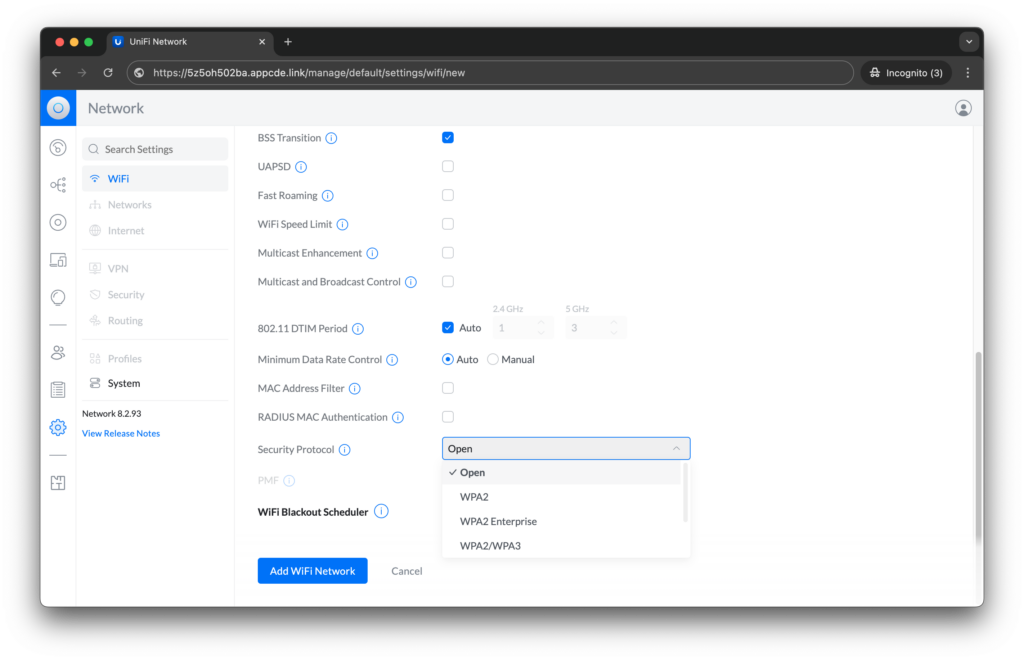
Scroll down and select the Security Protocol you desire.
Note that your data might be susceptible to sniffing (leakage) when using an Open Wi-Fi network
Click Add WiFi Network to provision the network to your Access Points. You should see your created network like so below.
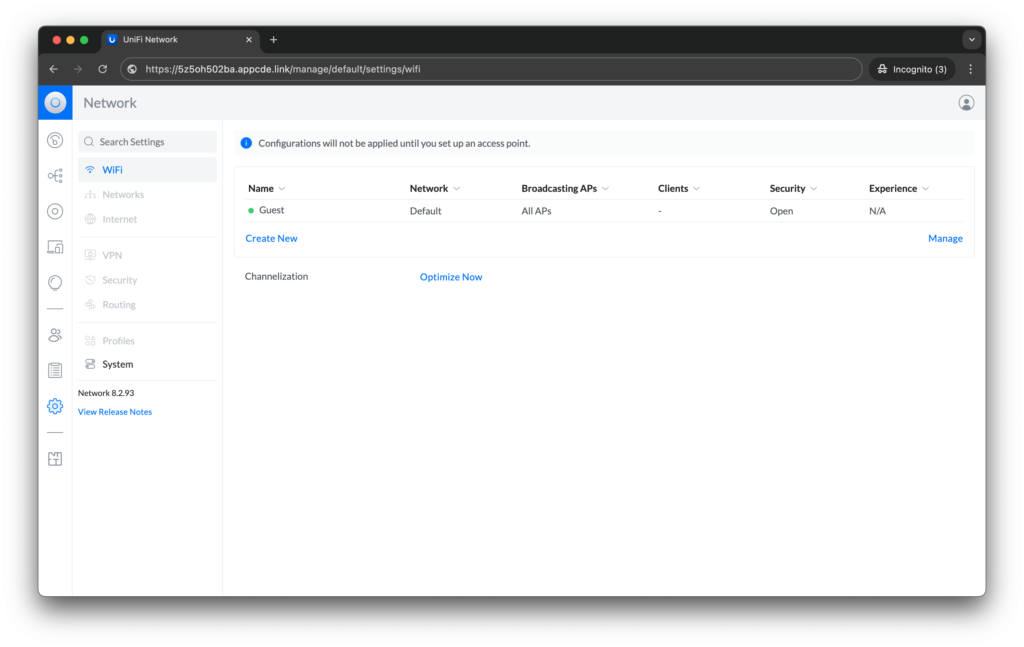
Once again, click on the name of the Wi-Fi network you just created. For us, that is “Guest”.

Click on the link Hotspot Portal highlighted in blue.
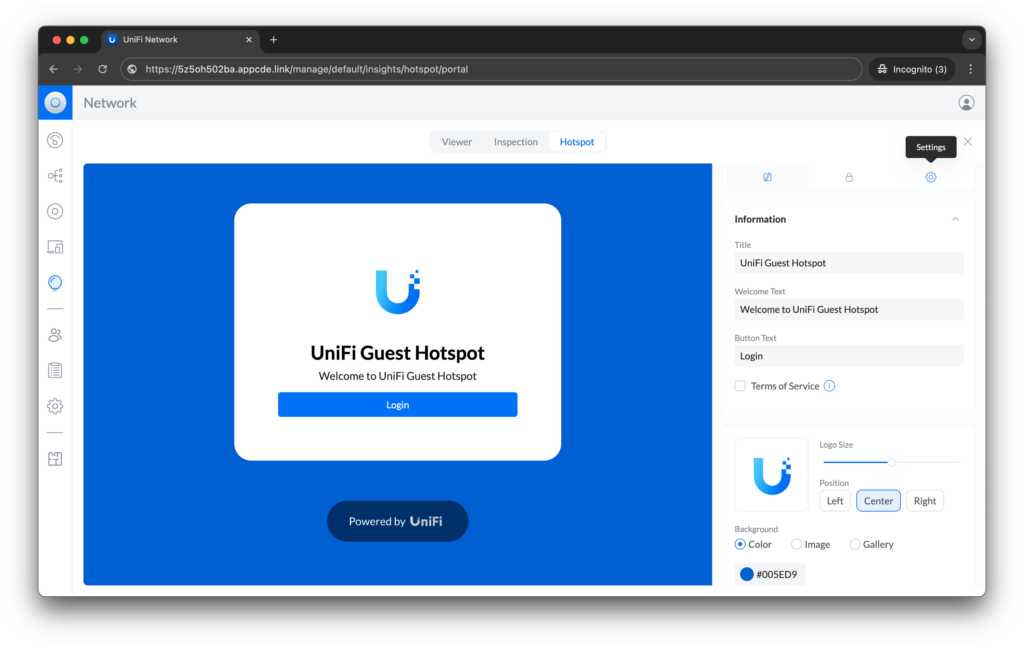
You may adjust the layout to your liking. Thereafter, click on the Settings tab denoted by the cogwheel icon on the right of the page (third icon above the word “Information”), to bring up the hotspot portal settings page.
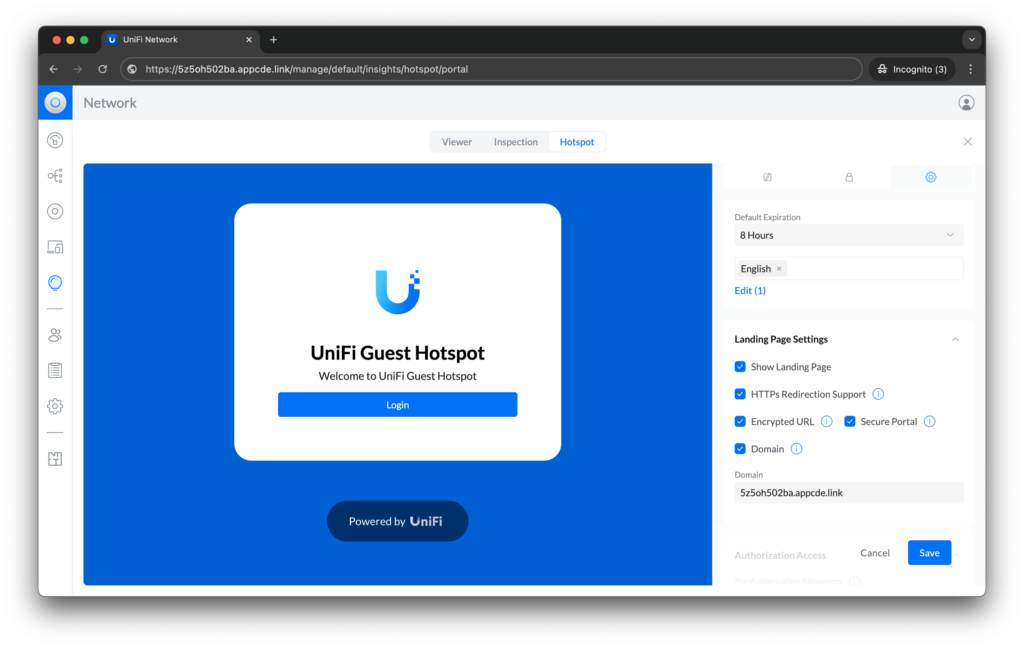
Ensure that both Secure Portal and Domain are checked.
Copy the domain from your browser’s URL bar into the Domain blank.
For instance, if the URL is https://97qyypmhf3zd.appcde.link/manage/default/insights/hotspot/portal97qyypmhf3zd.appcde.link into the blank and click Save.
Conclusion
Following these steps, you should now have successfully created a guest Wi-Fi network with a hotspot portal. Try it out by connecting to the Wi-Fi network with your device.
Feel free to refer back to this guide if you encounter any issues or need to provision additional guest networks. Happy networking!

