This guide provides an overview of setting up and running the UniFi Network Application (controller) on Amazon LightSail, a user-friendly cloud computing service. The document covers the installation process, including configurations, and security considerations specific to Amazon LightSail’s environment. This guide equips you with the essential steps to get started.
If you prefer a turn-key one-click solution, check out Uniquely.Cloud effortless Unifi Controller Hosting!
Let’s get started
First head over to the Amazon LightSail homepage here: https://lightsail.aws.amazon.com/ls/webapp/home/instances, if you have not created an AWS account, go ahead and create one.
Once you have logged in you should see the following screen. (If you see a Welcome Pop-up, you can click skip for now)
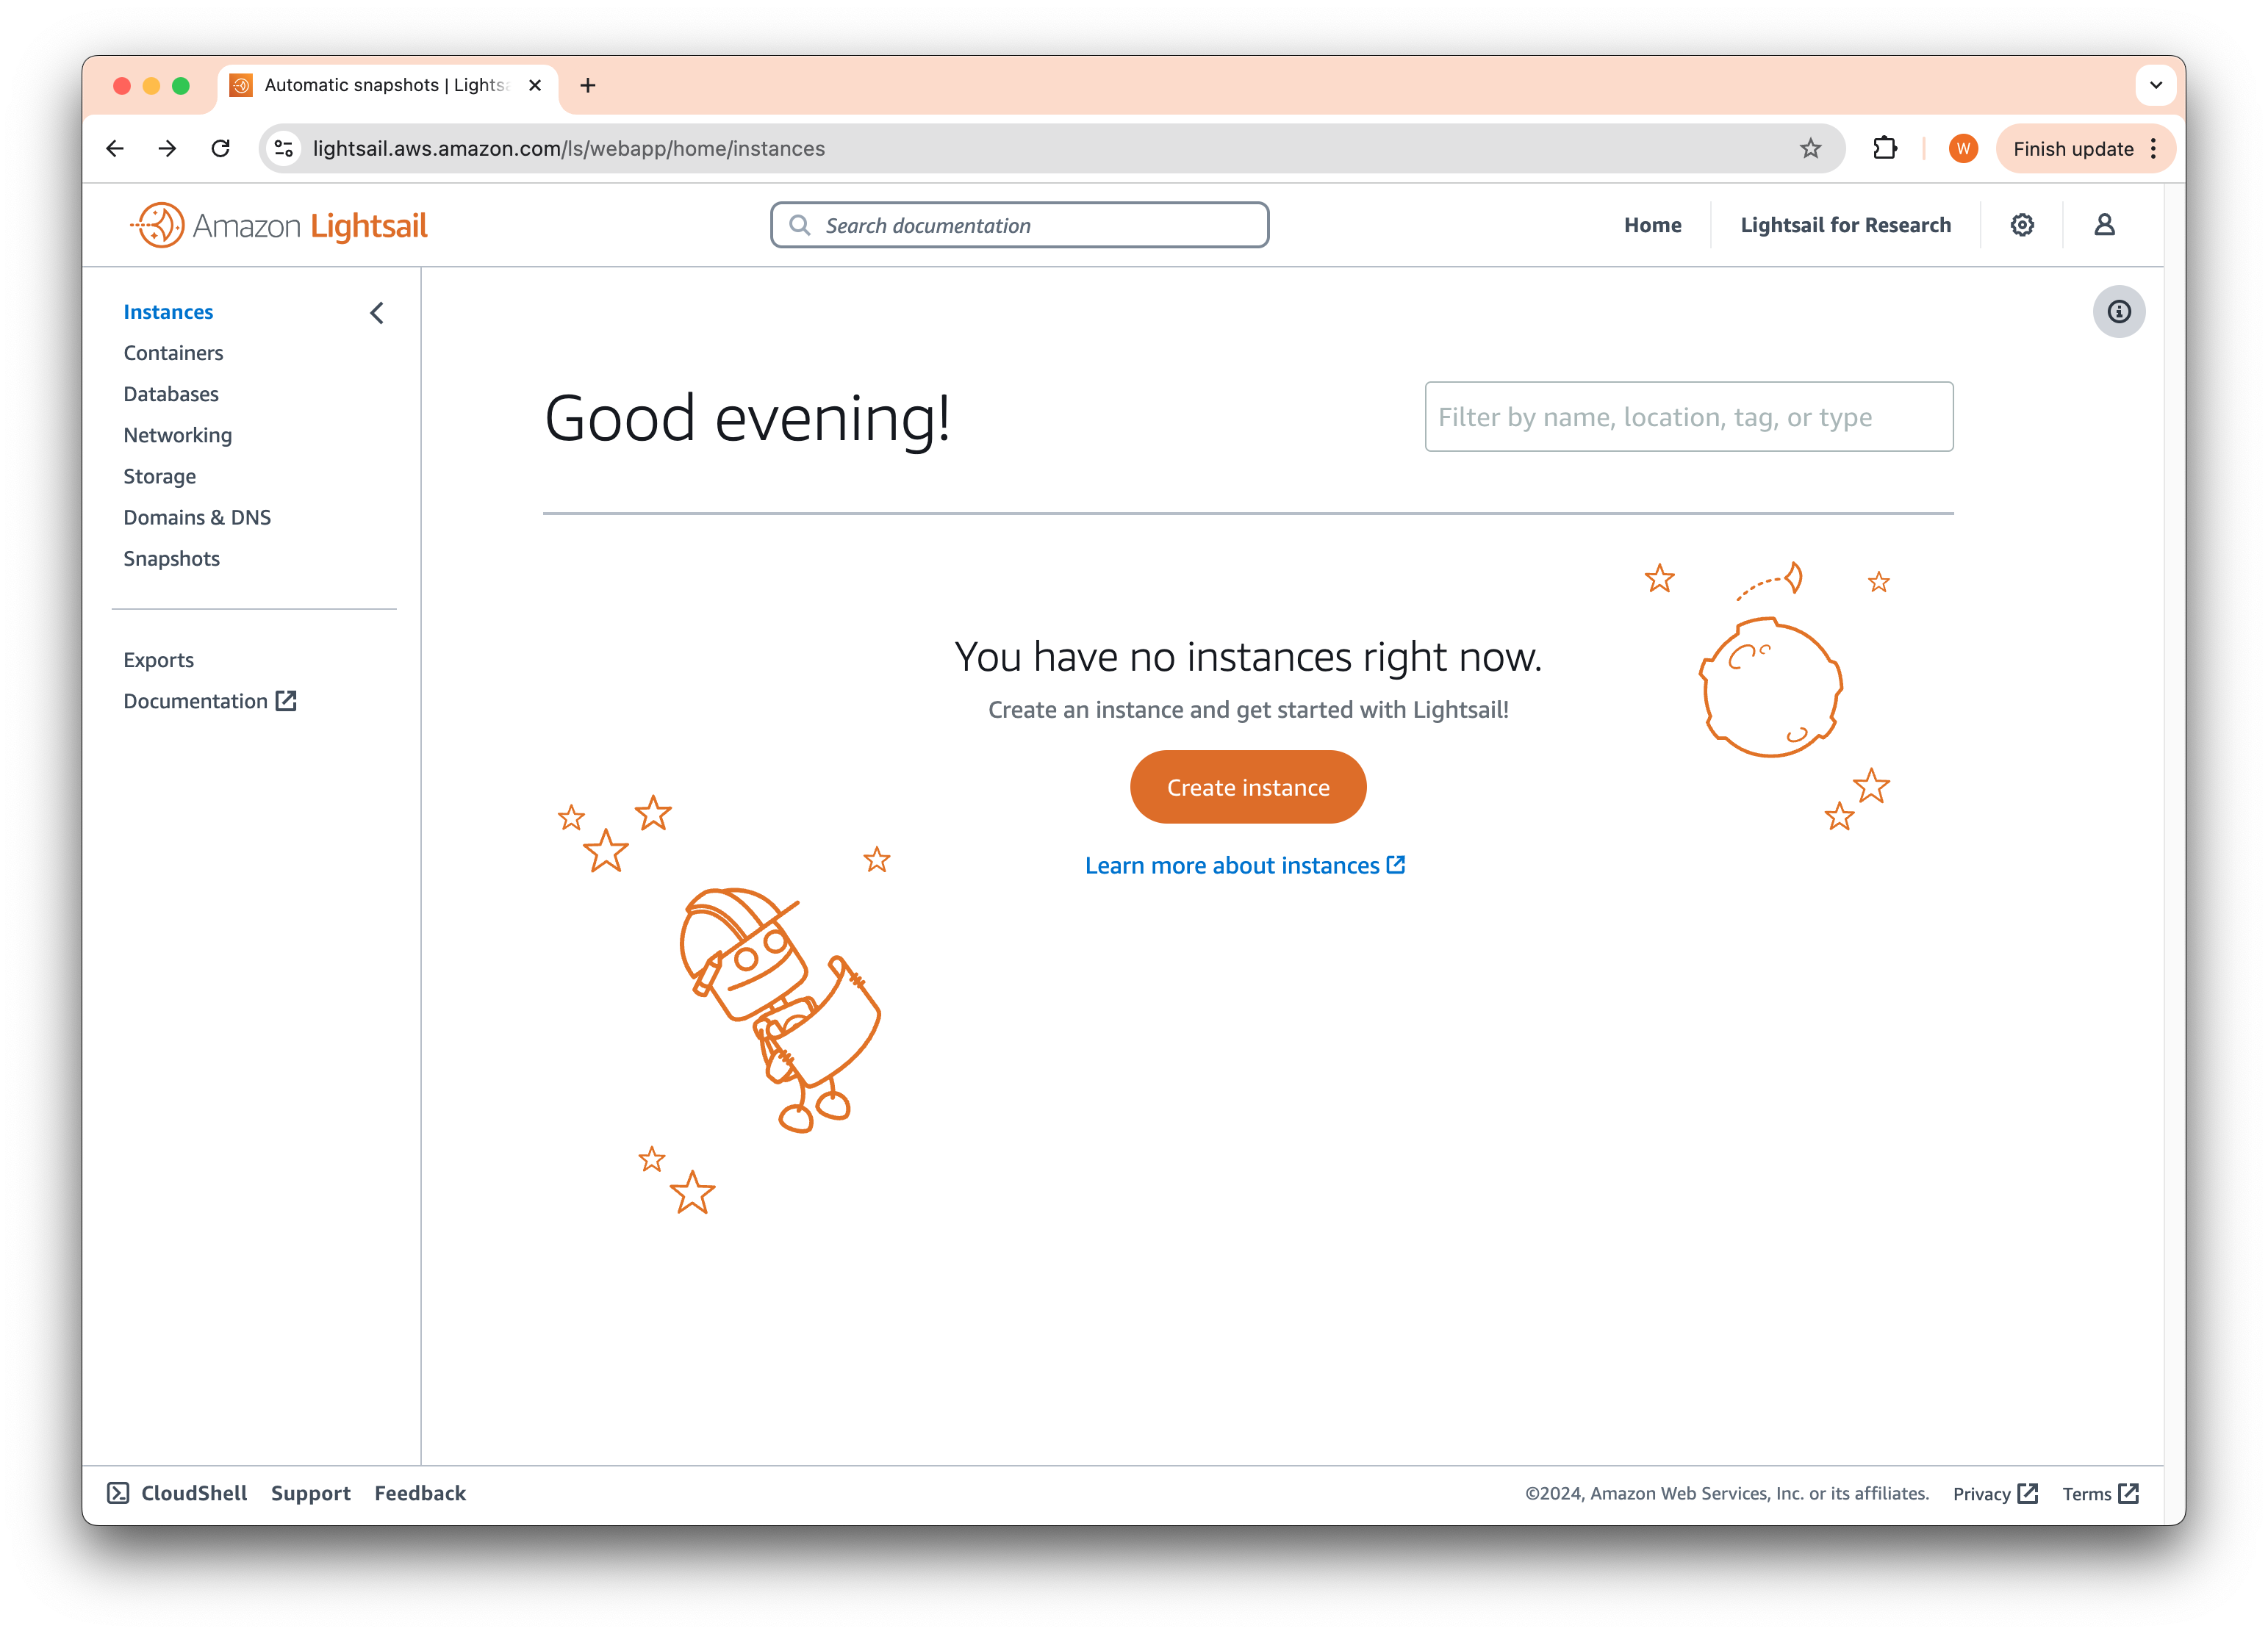
Click on Create Instance, to bring up the instance creation page.
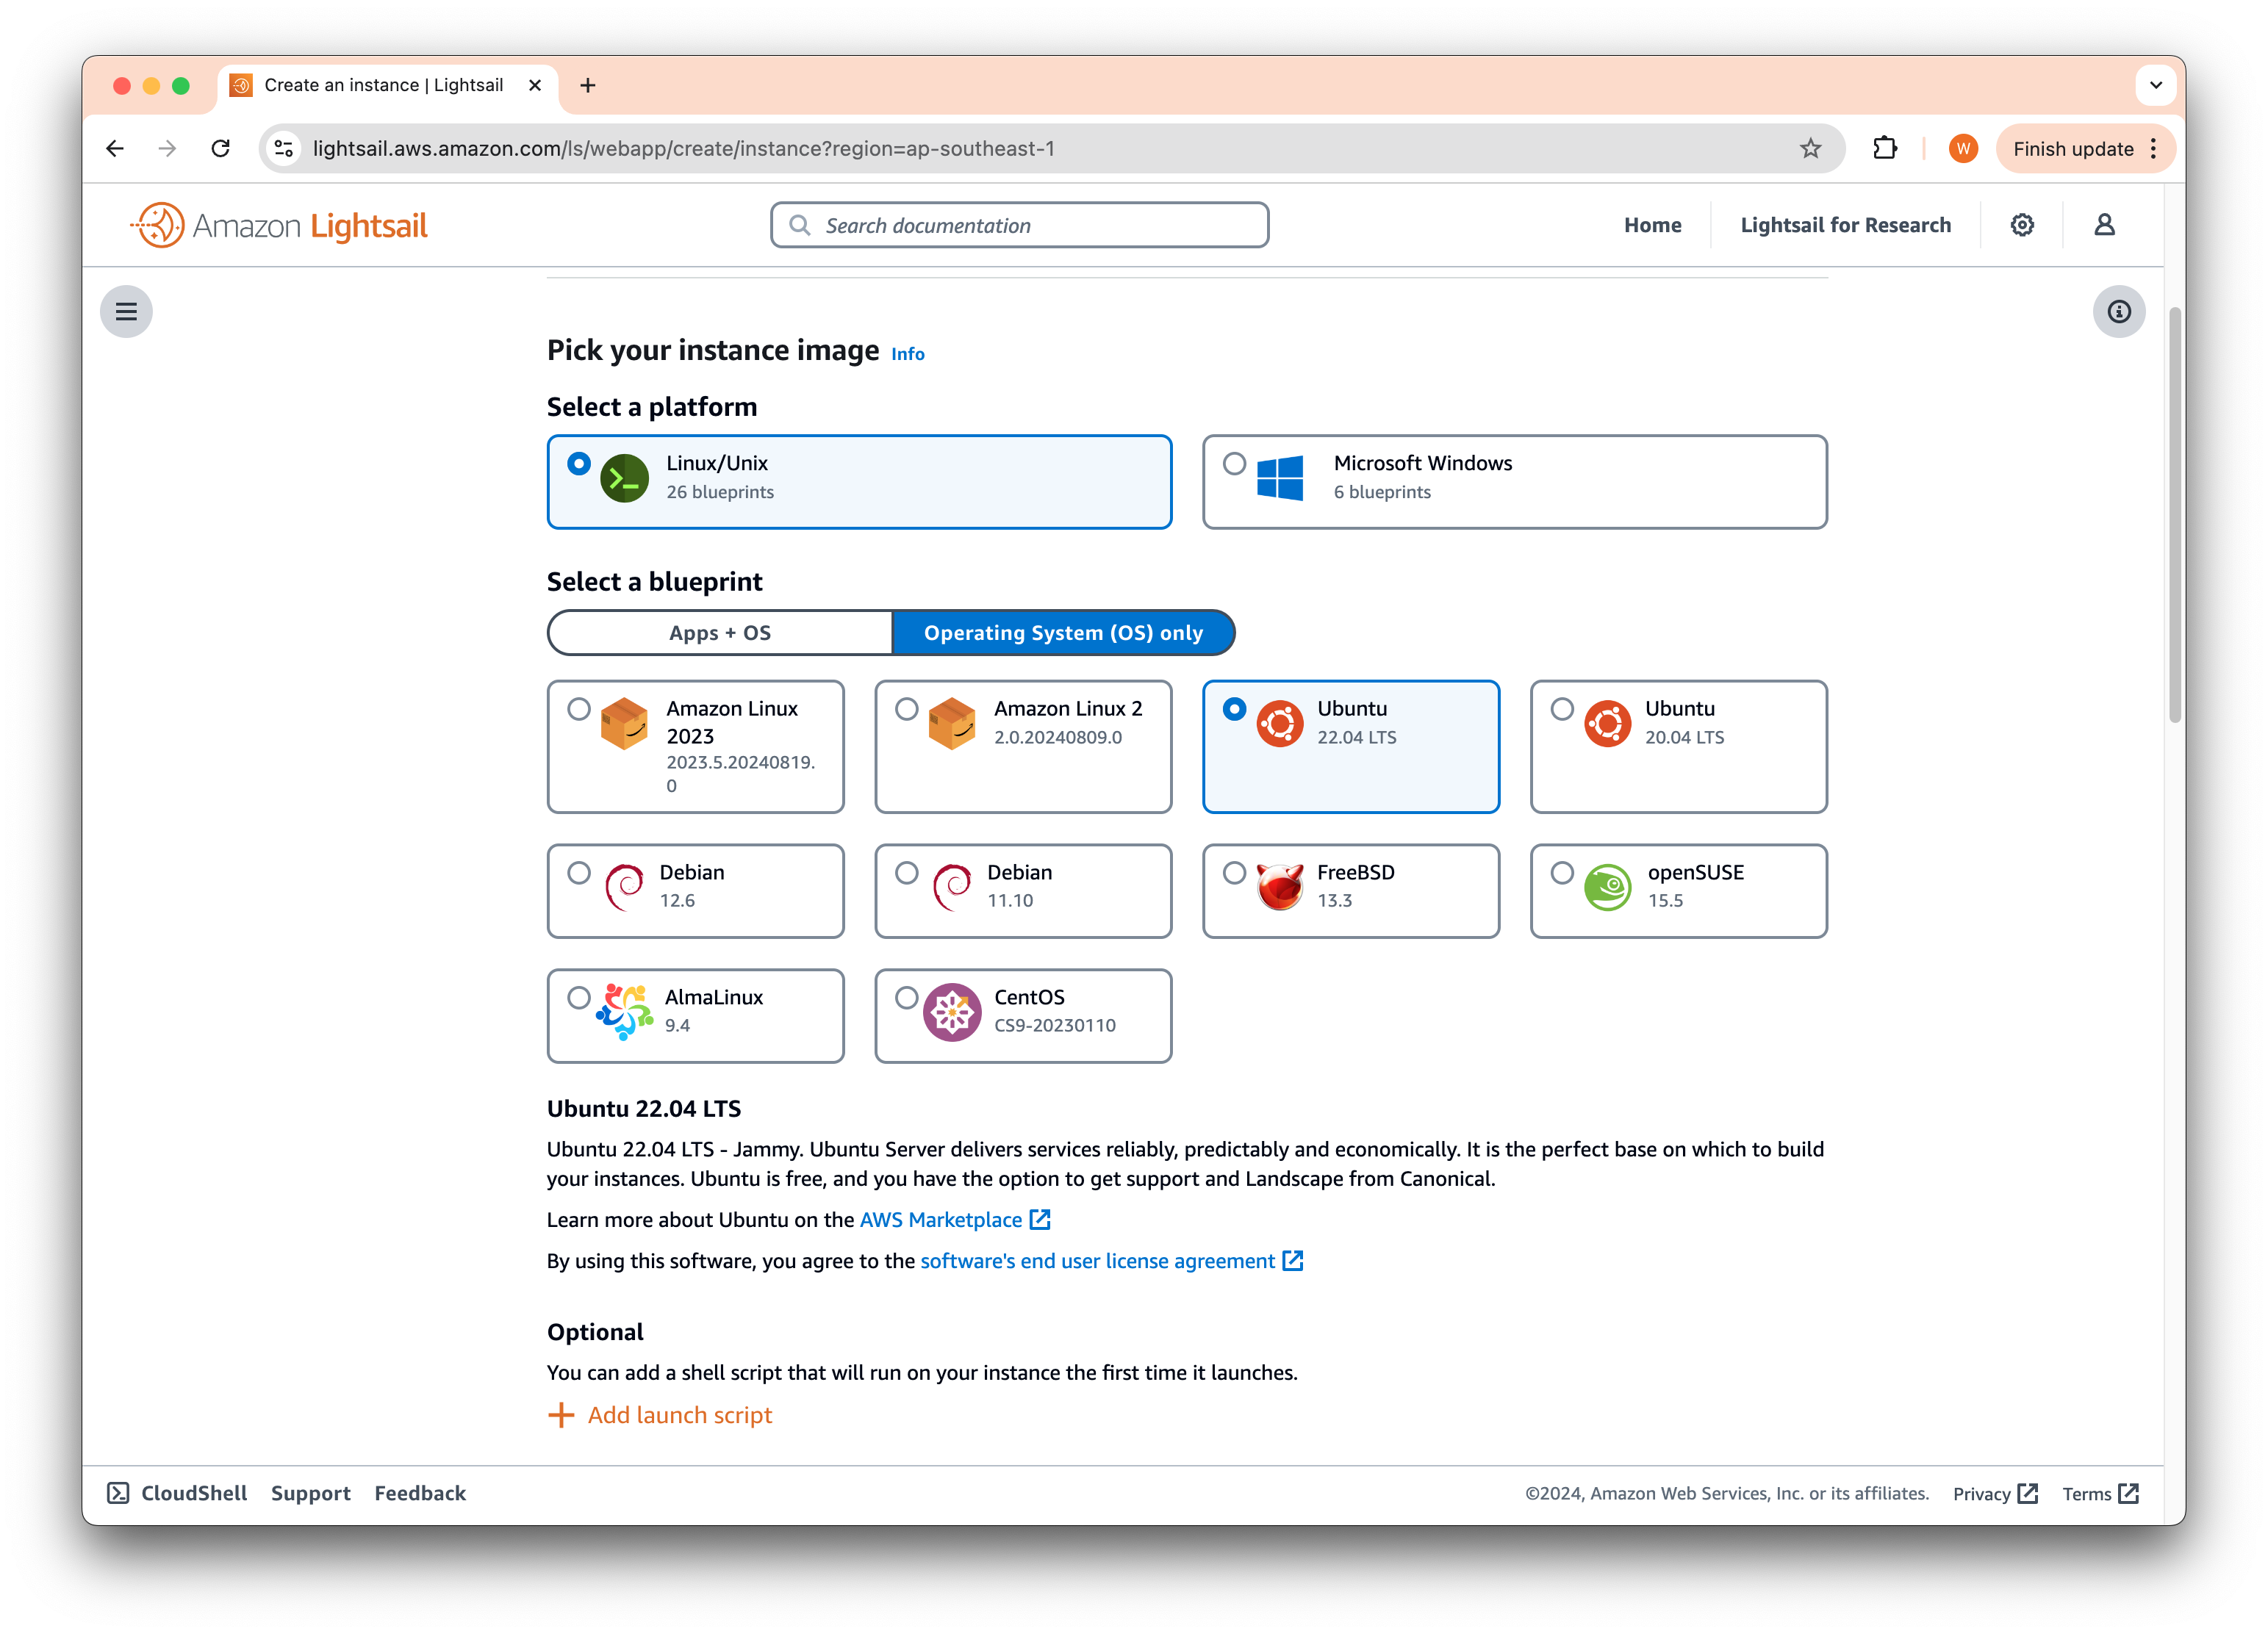
For the platform, select Linux/Unix. Under the blueprint section, choose Operating System (OS) only and Ubuntu 22.04 LTS. Since there is no preloaded Unifi Application, we need to install Unifi Network ourselves.
Scroll down to reveal the plan and price section.
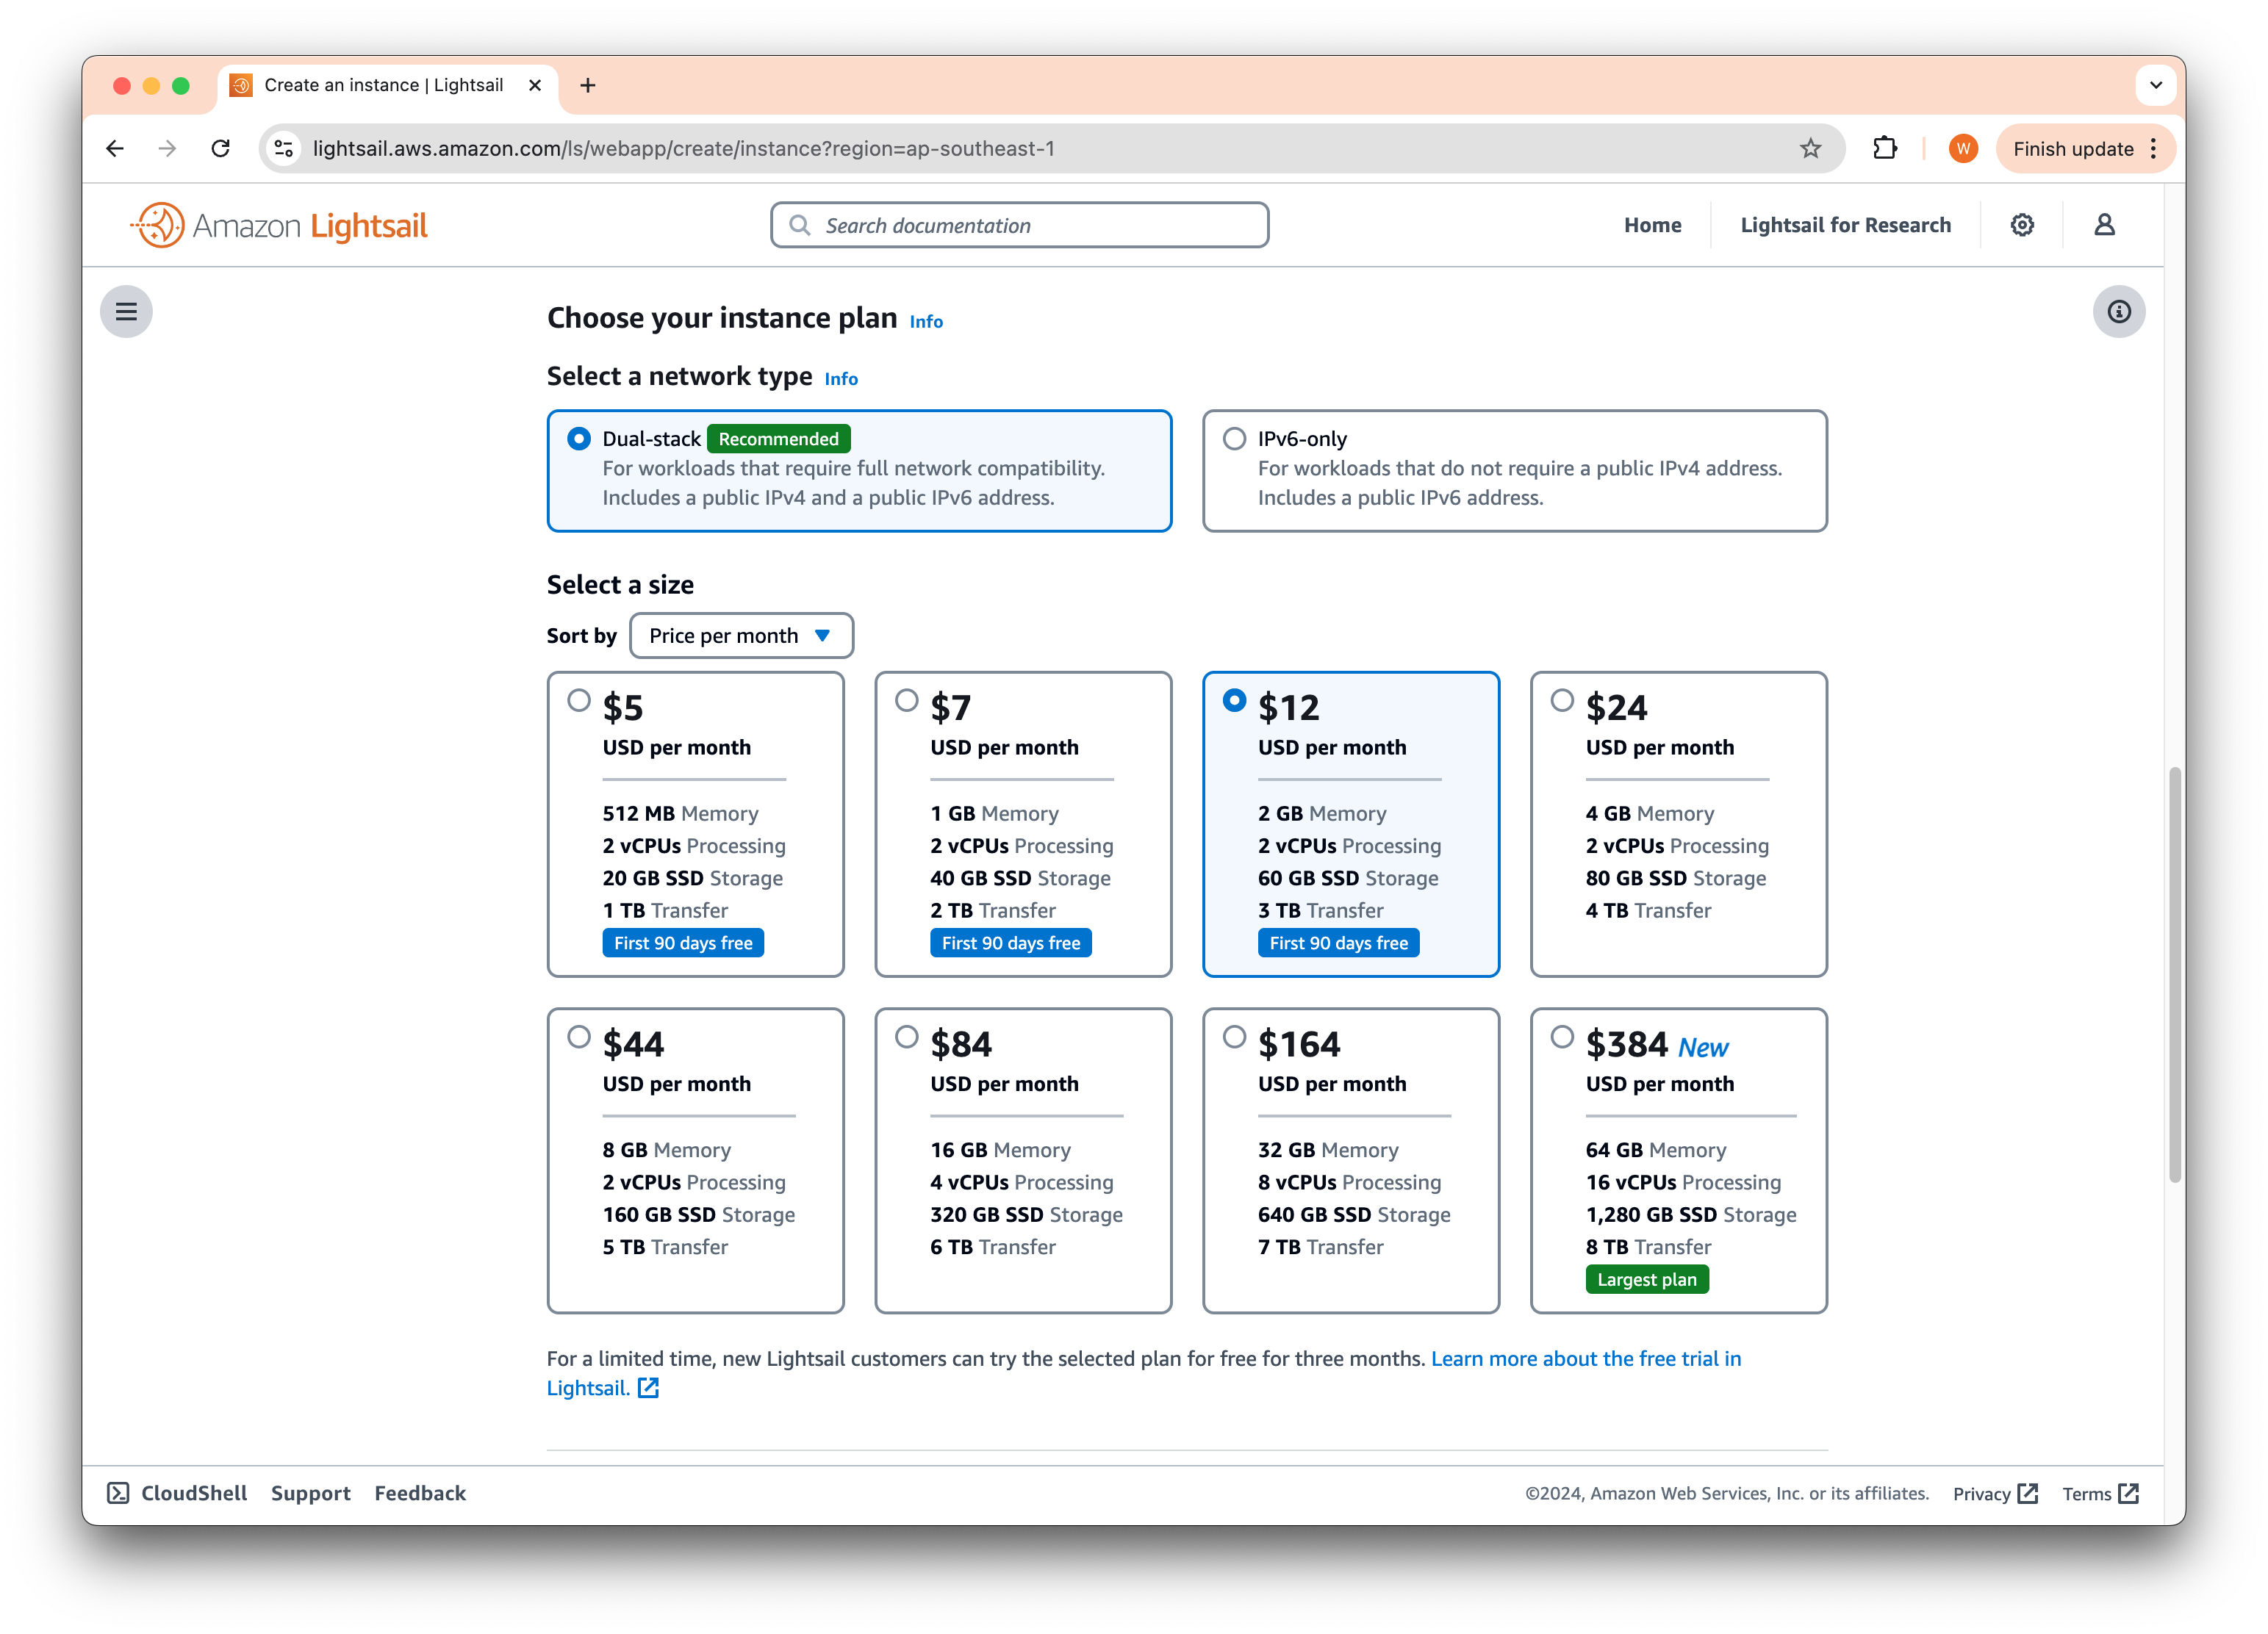
For the network type select Dual-stack since most of the Ubiquiti Unifi devices still do not support IPv6 for management. For smaller networks, the USD $12/month plan should be sufficient. If you have more devices, consider opting for a larger plan that better meets your requirements.
Once you are done scroll down fill in a name for the instance to your liking (we will name it Unifi-App) and click Create Instance.
You should see your instance with a Pending status. Give it a few minutes and refresh the page, it should now say Running and the icon should now be colored.
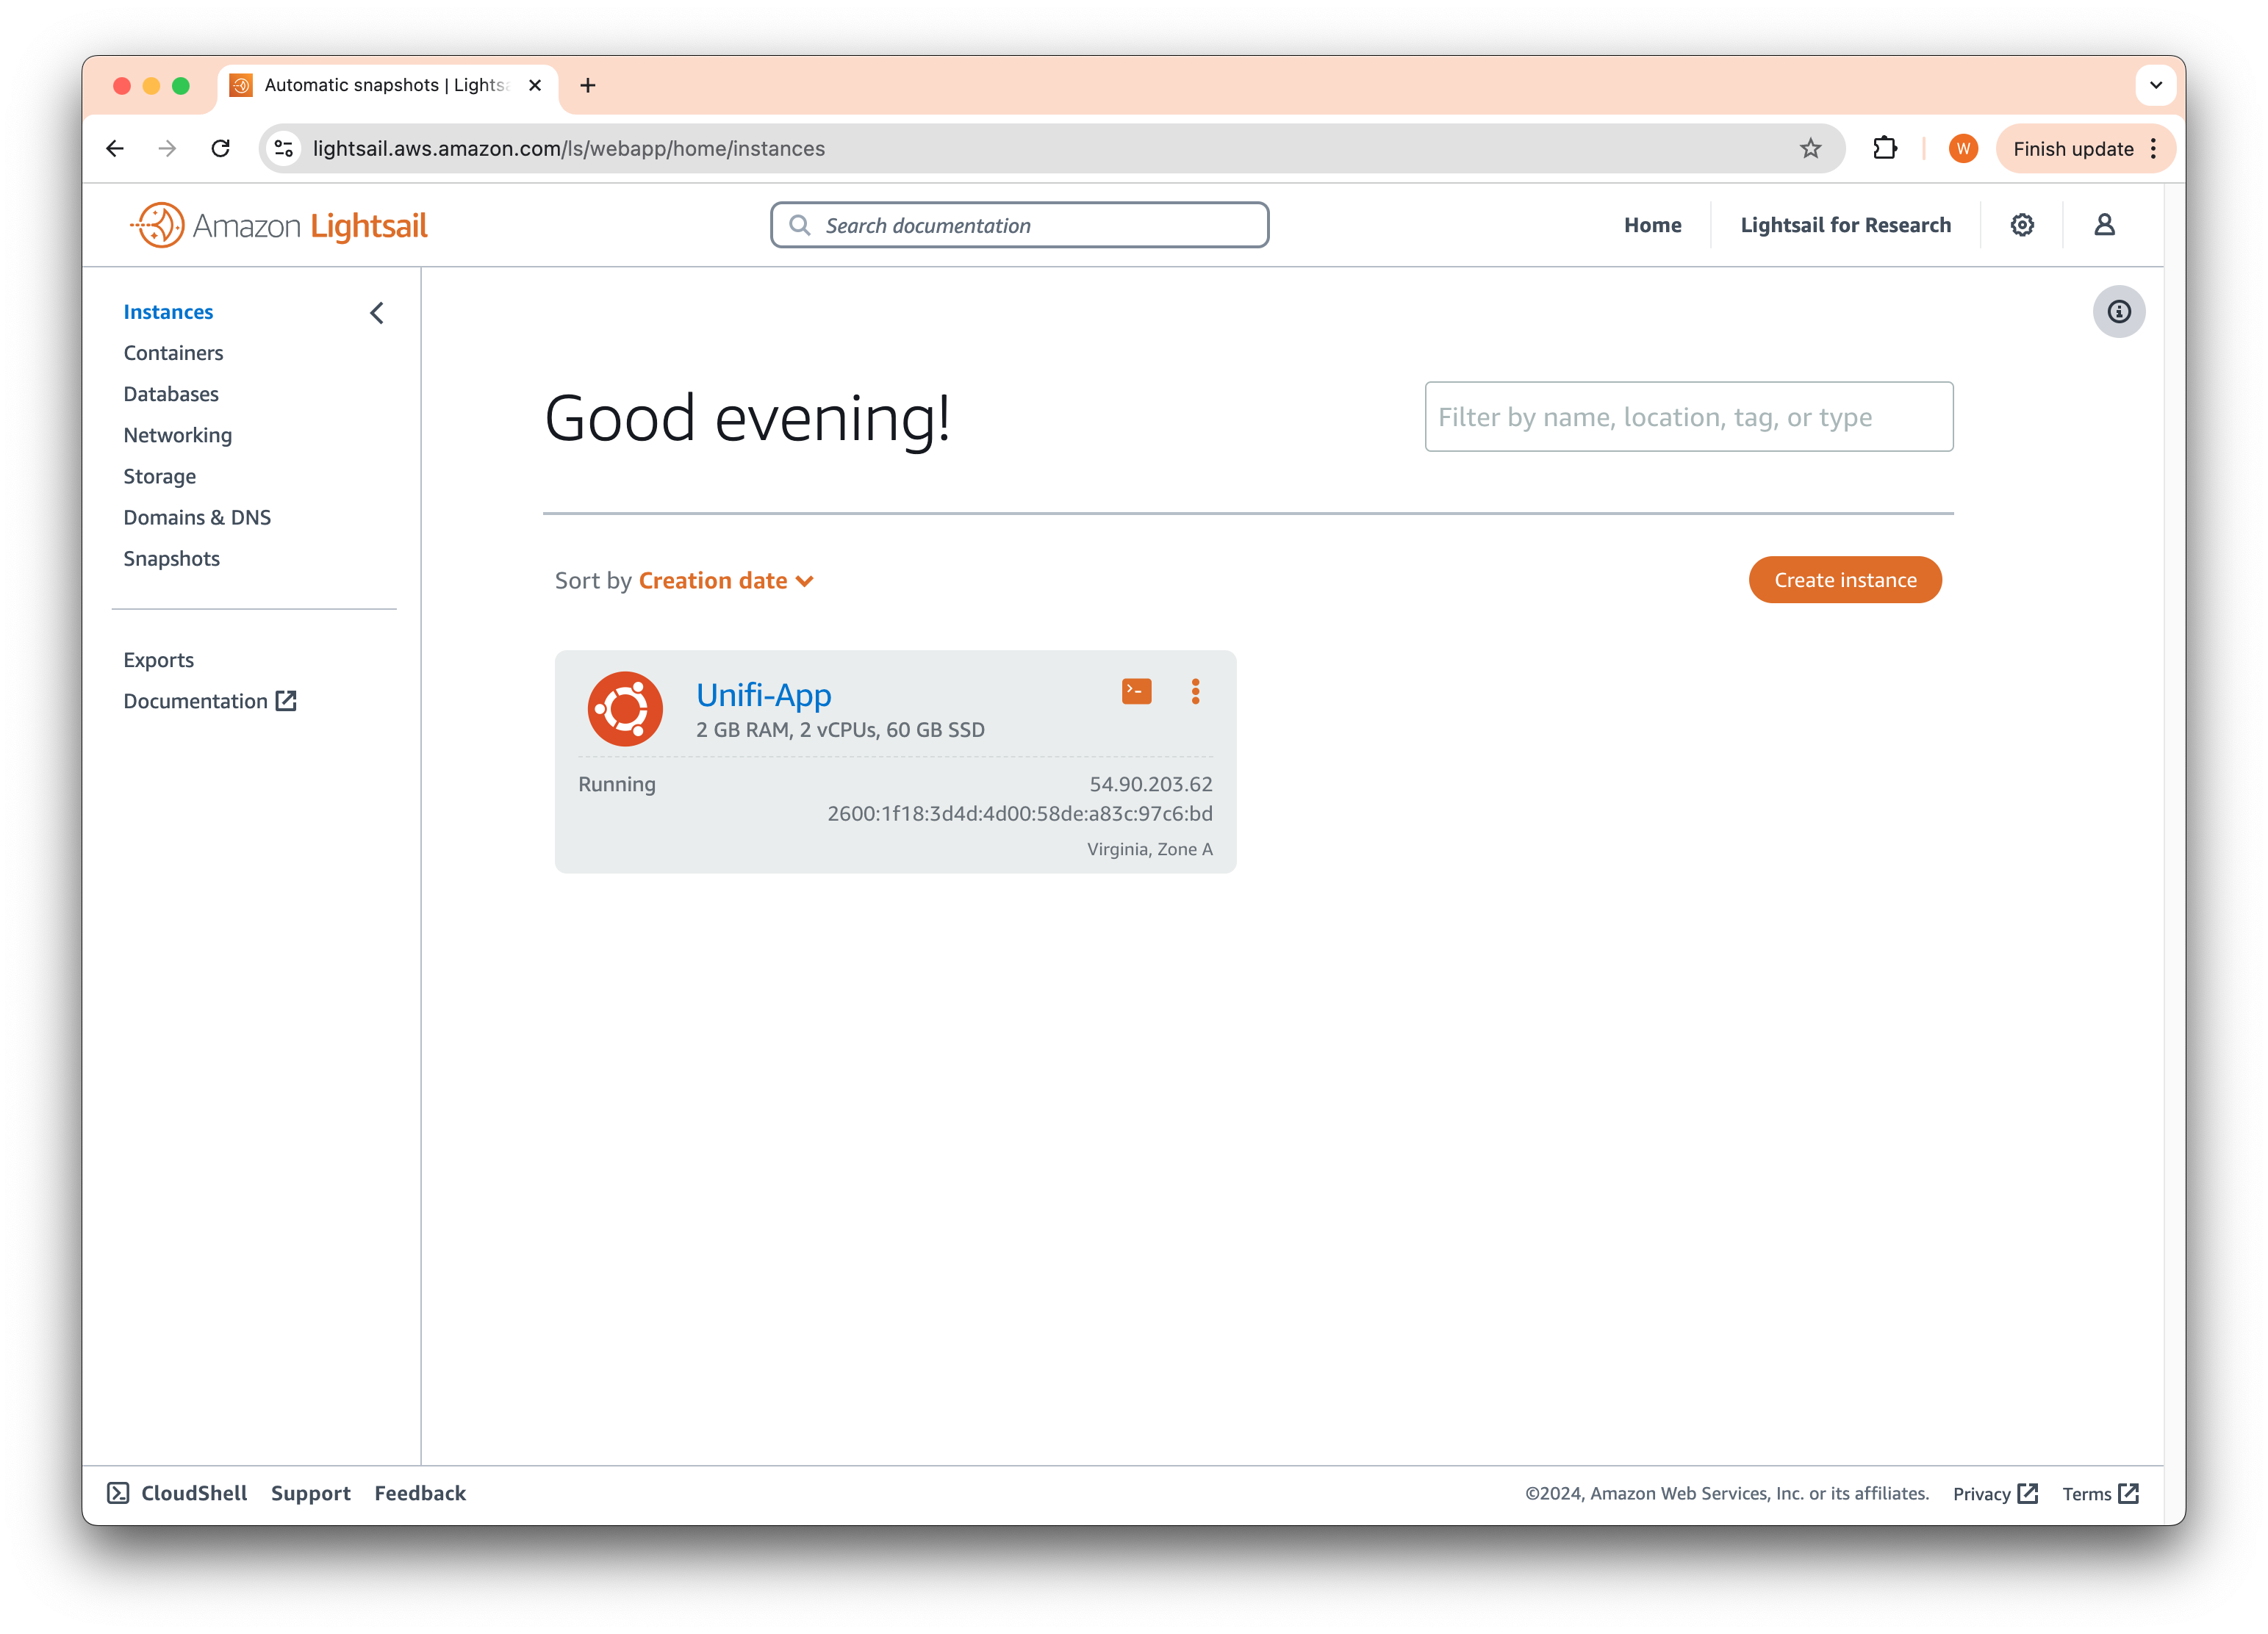
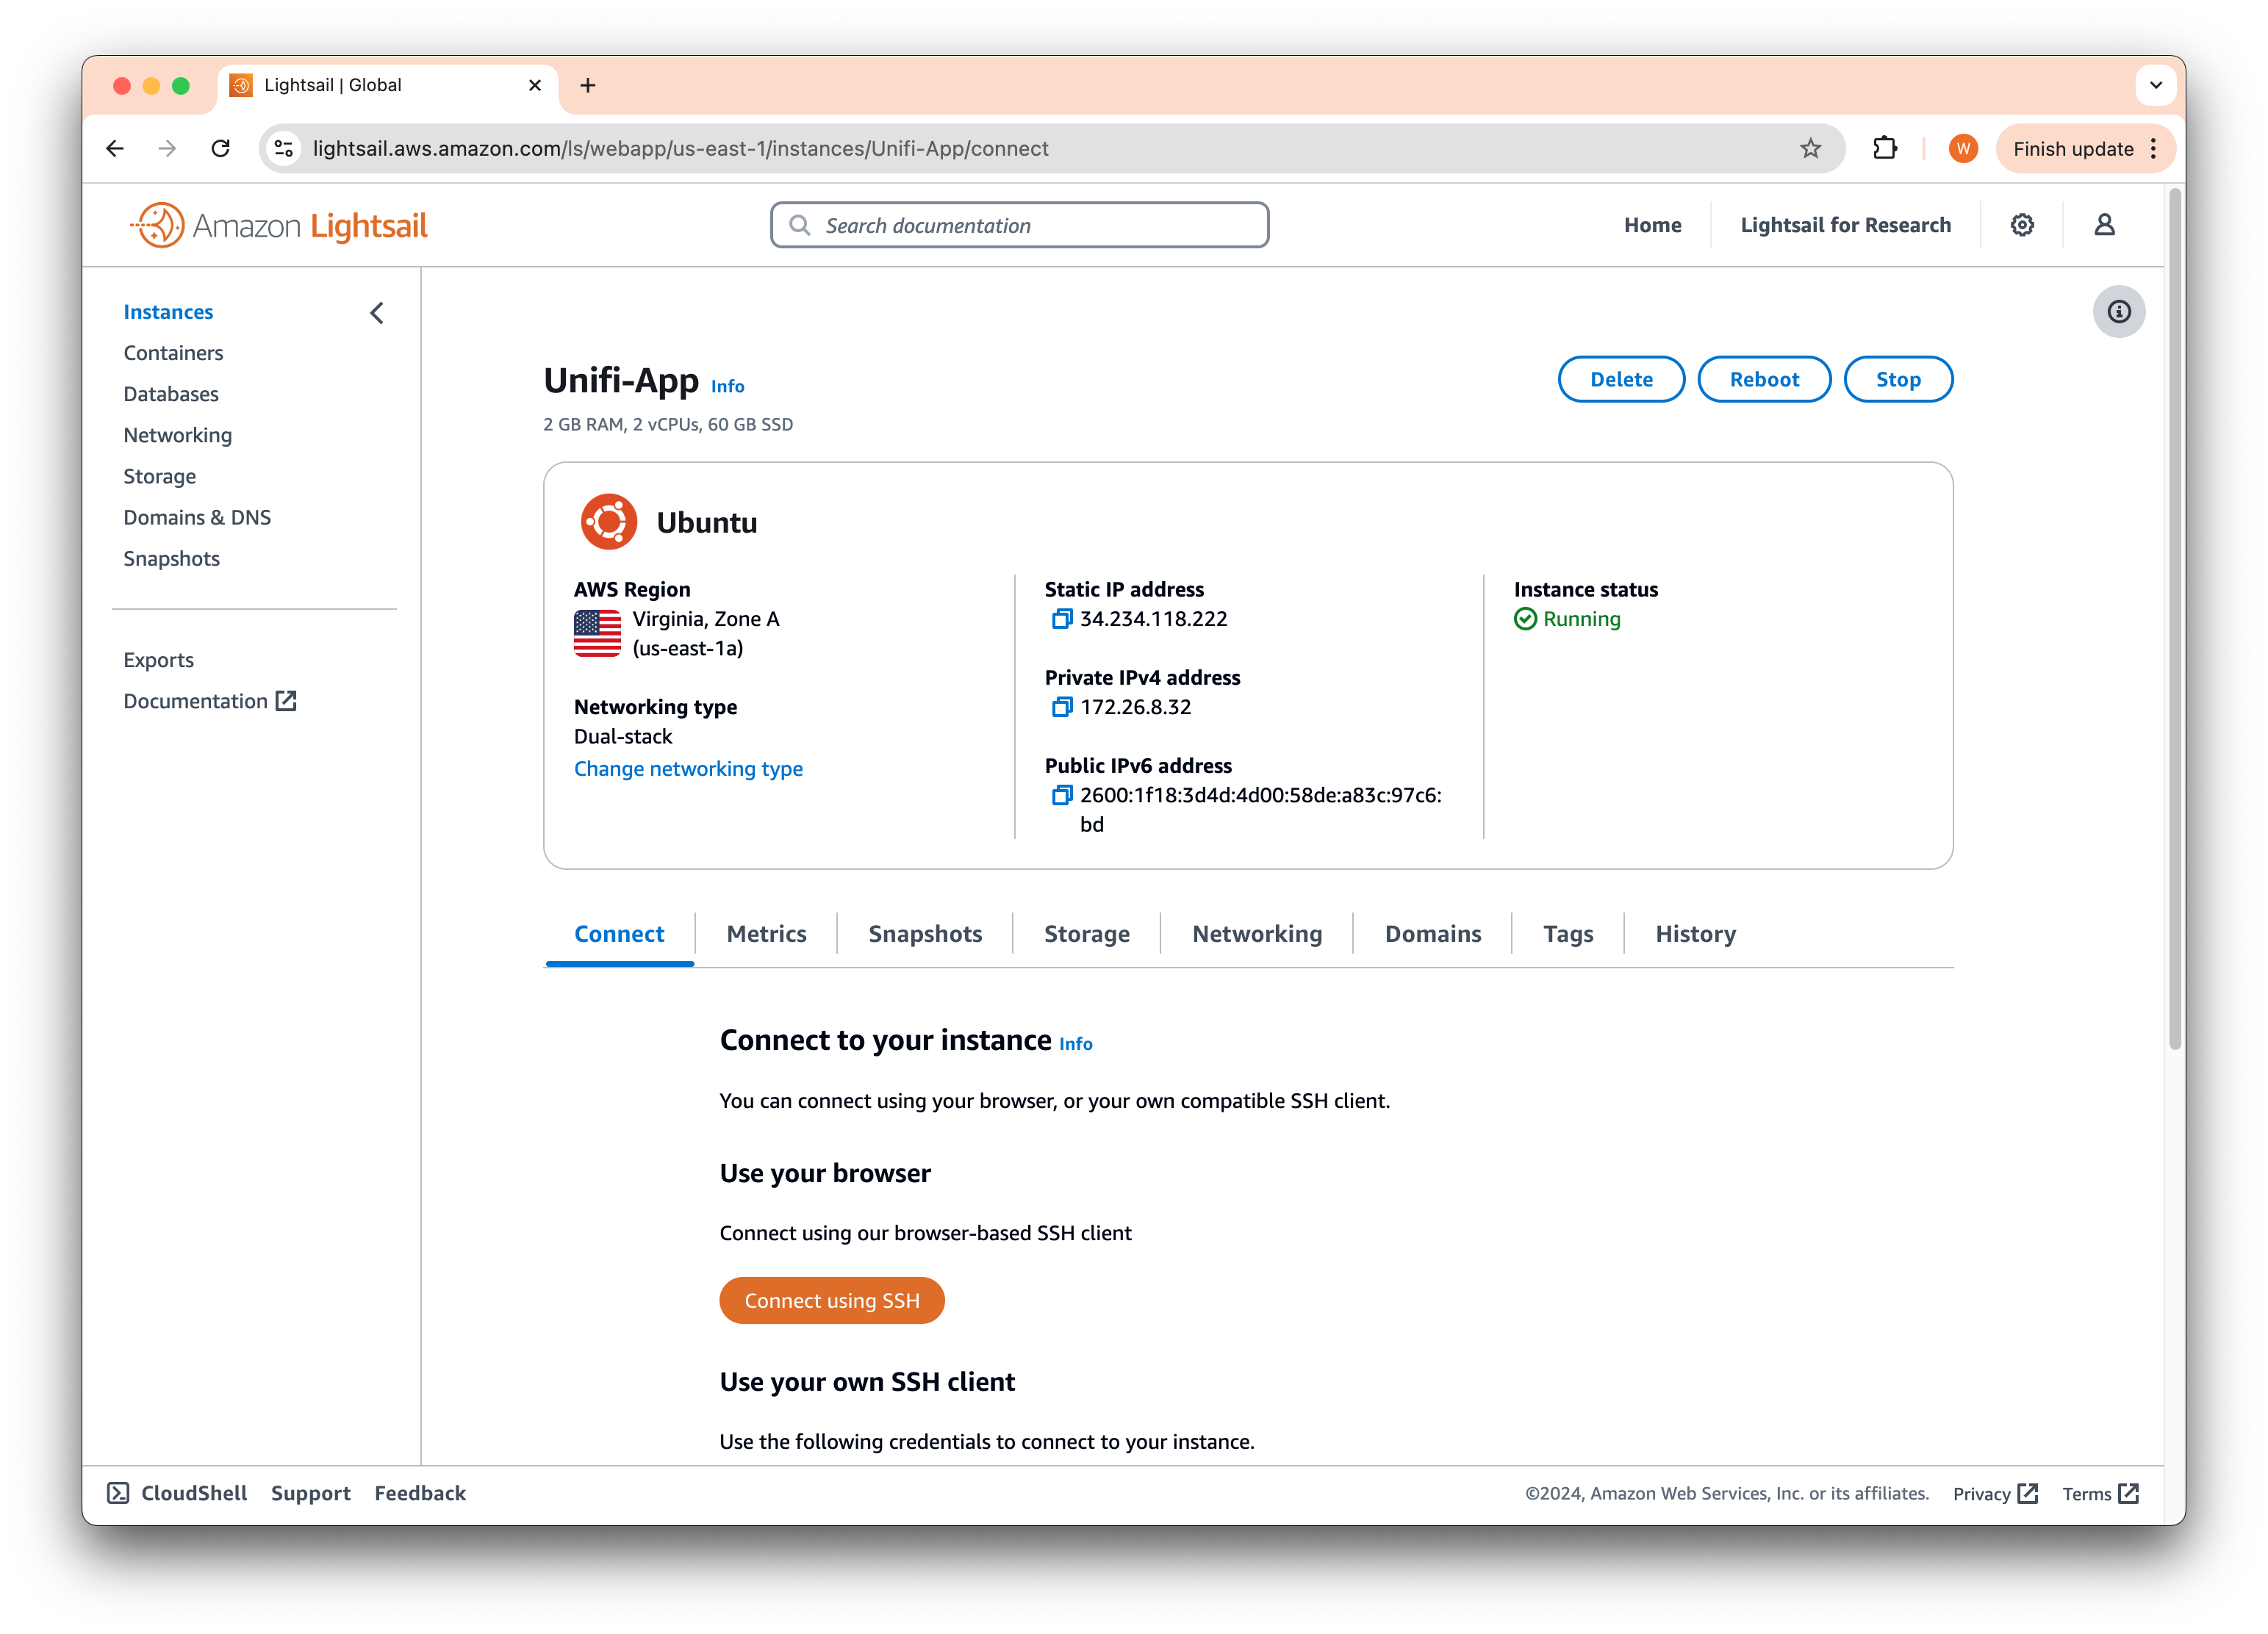
Click on the name of the instance you have created on LightSail, in our case it is Unifi-App. This will bring up the following page.
Installing the Application
Click on Connect using SSH to reveal a mysterious black window. Where you will need to paste and run some code. Don’t you feel like one of those hackers in a Hollywood movie?
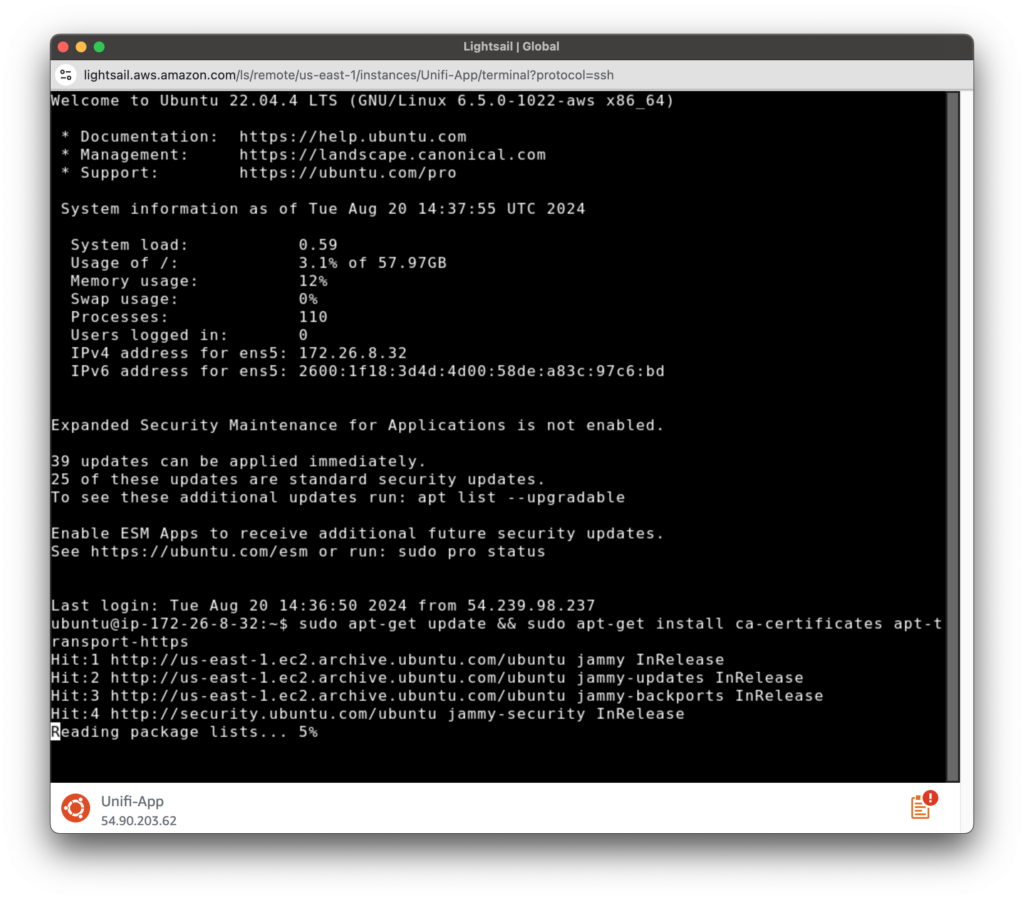
Copy each block of code and run it in the black window, making sure to hit the Enter key on your keyboard between each run.
Let’s first install some dependencies for the system.
sudo apt-get update && sudo apt-get install ca-certificates apt-transport-https -yWe add the Unifi repository to our system.
echo 'deb [ arch=amd64,arm64 ] https://www.ui.com/downloads/unifi/debian stable ubiquiti' | sudo tee /etc/apt/sources.list.d/100-ubnt-unifi.listsudo wget -O /etc/apt/trusted.gpg.d/unifi-repo.gpg https://dl.ui.com/unifi/unifi-repo.gpgNext, we install MongoDB.
curl -fsSL https://www.mongodb.org/static/pgp/server-7.0.asc | sudo gpg -o /usr/share/keyrings/mongodb-server-7.0.gpg --dearmorecho "deb [ arch=amd64,arm64 signed-by=/usr/share/keyrings/mongodb-server-7.0.gpg ] https://repo.mongodb.org/apt/ubuntu jammy/mongodb-org/7.0 multiverse" | sudo tee /etc/apt/sources.list.d/mongodb-org-7.0.listFinally, we install the Unifi Network Application. This might take a while.
sudo apt-get update && sudo apt-get install unifi -yIf you got everything right, try running this code and you should see active (running) in green! You can now close the black window.
systemctl status unifi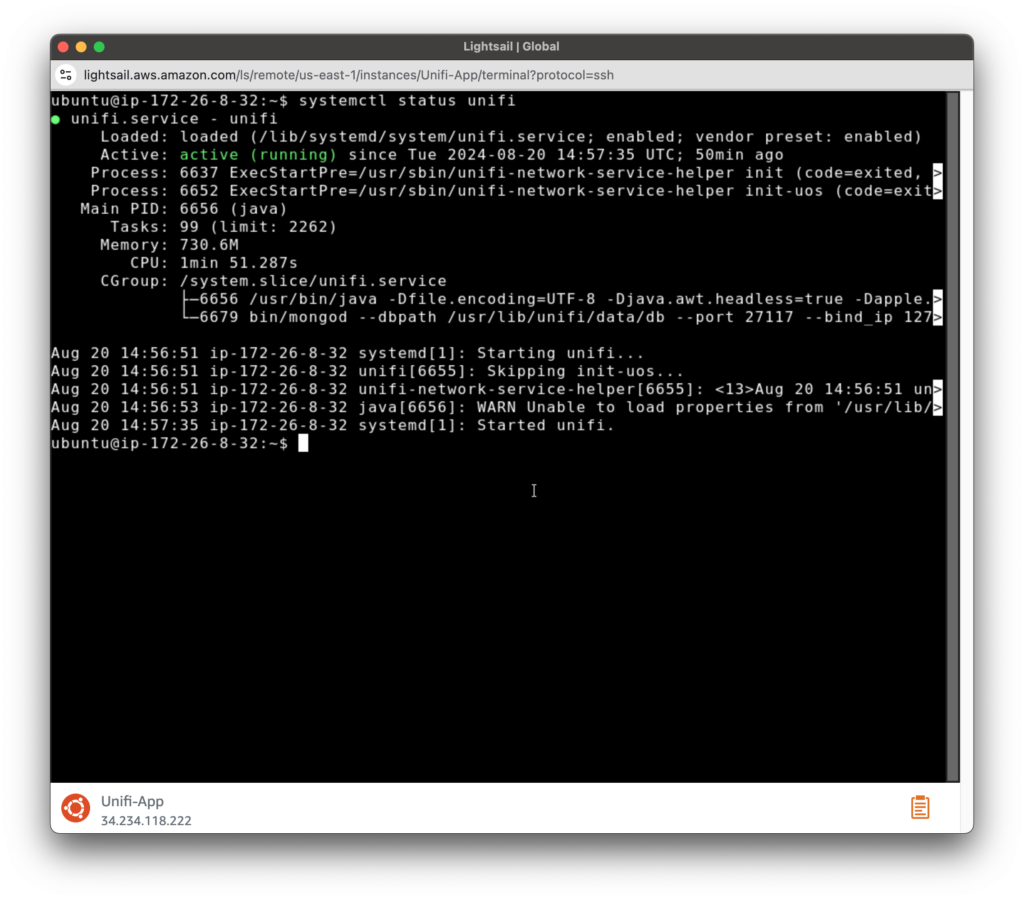
Configuring the network
Now back to the instance page. We need to make some adjustments to ensure that you can connect to the application. Click on the Networking tab in the middle of the screen.
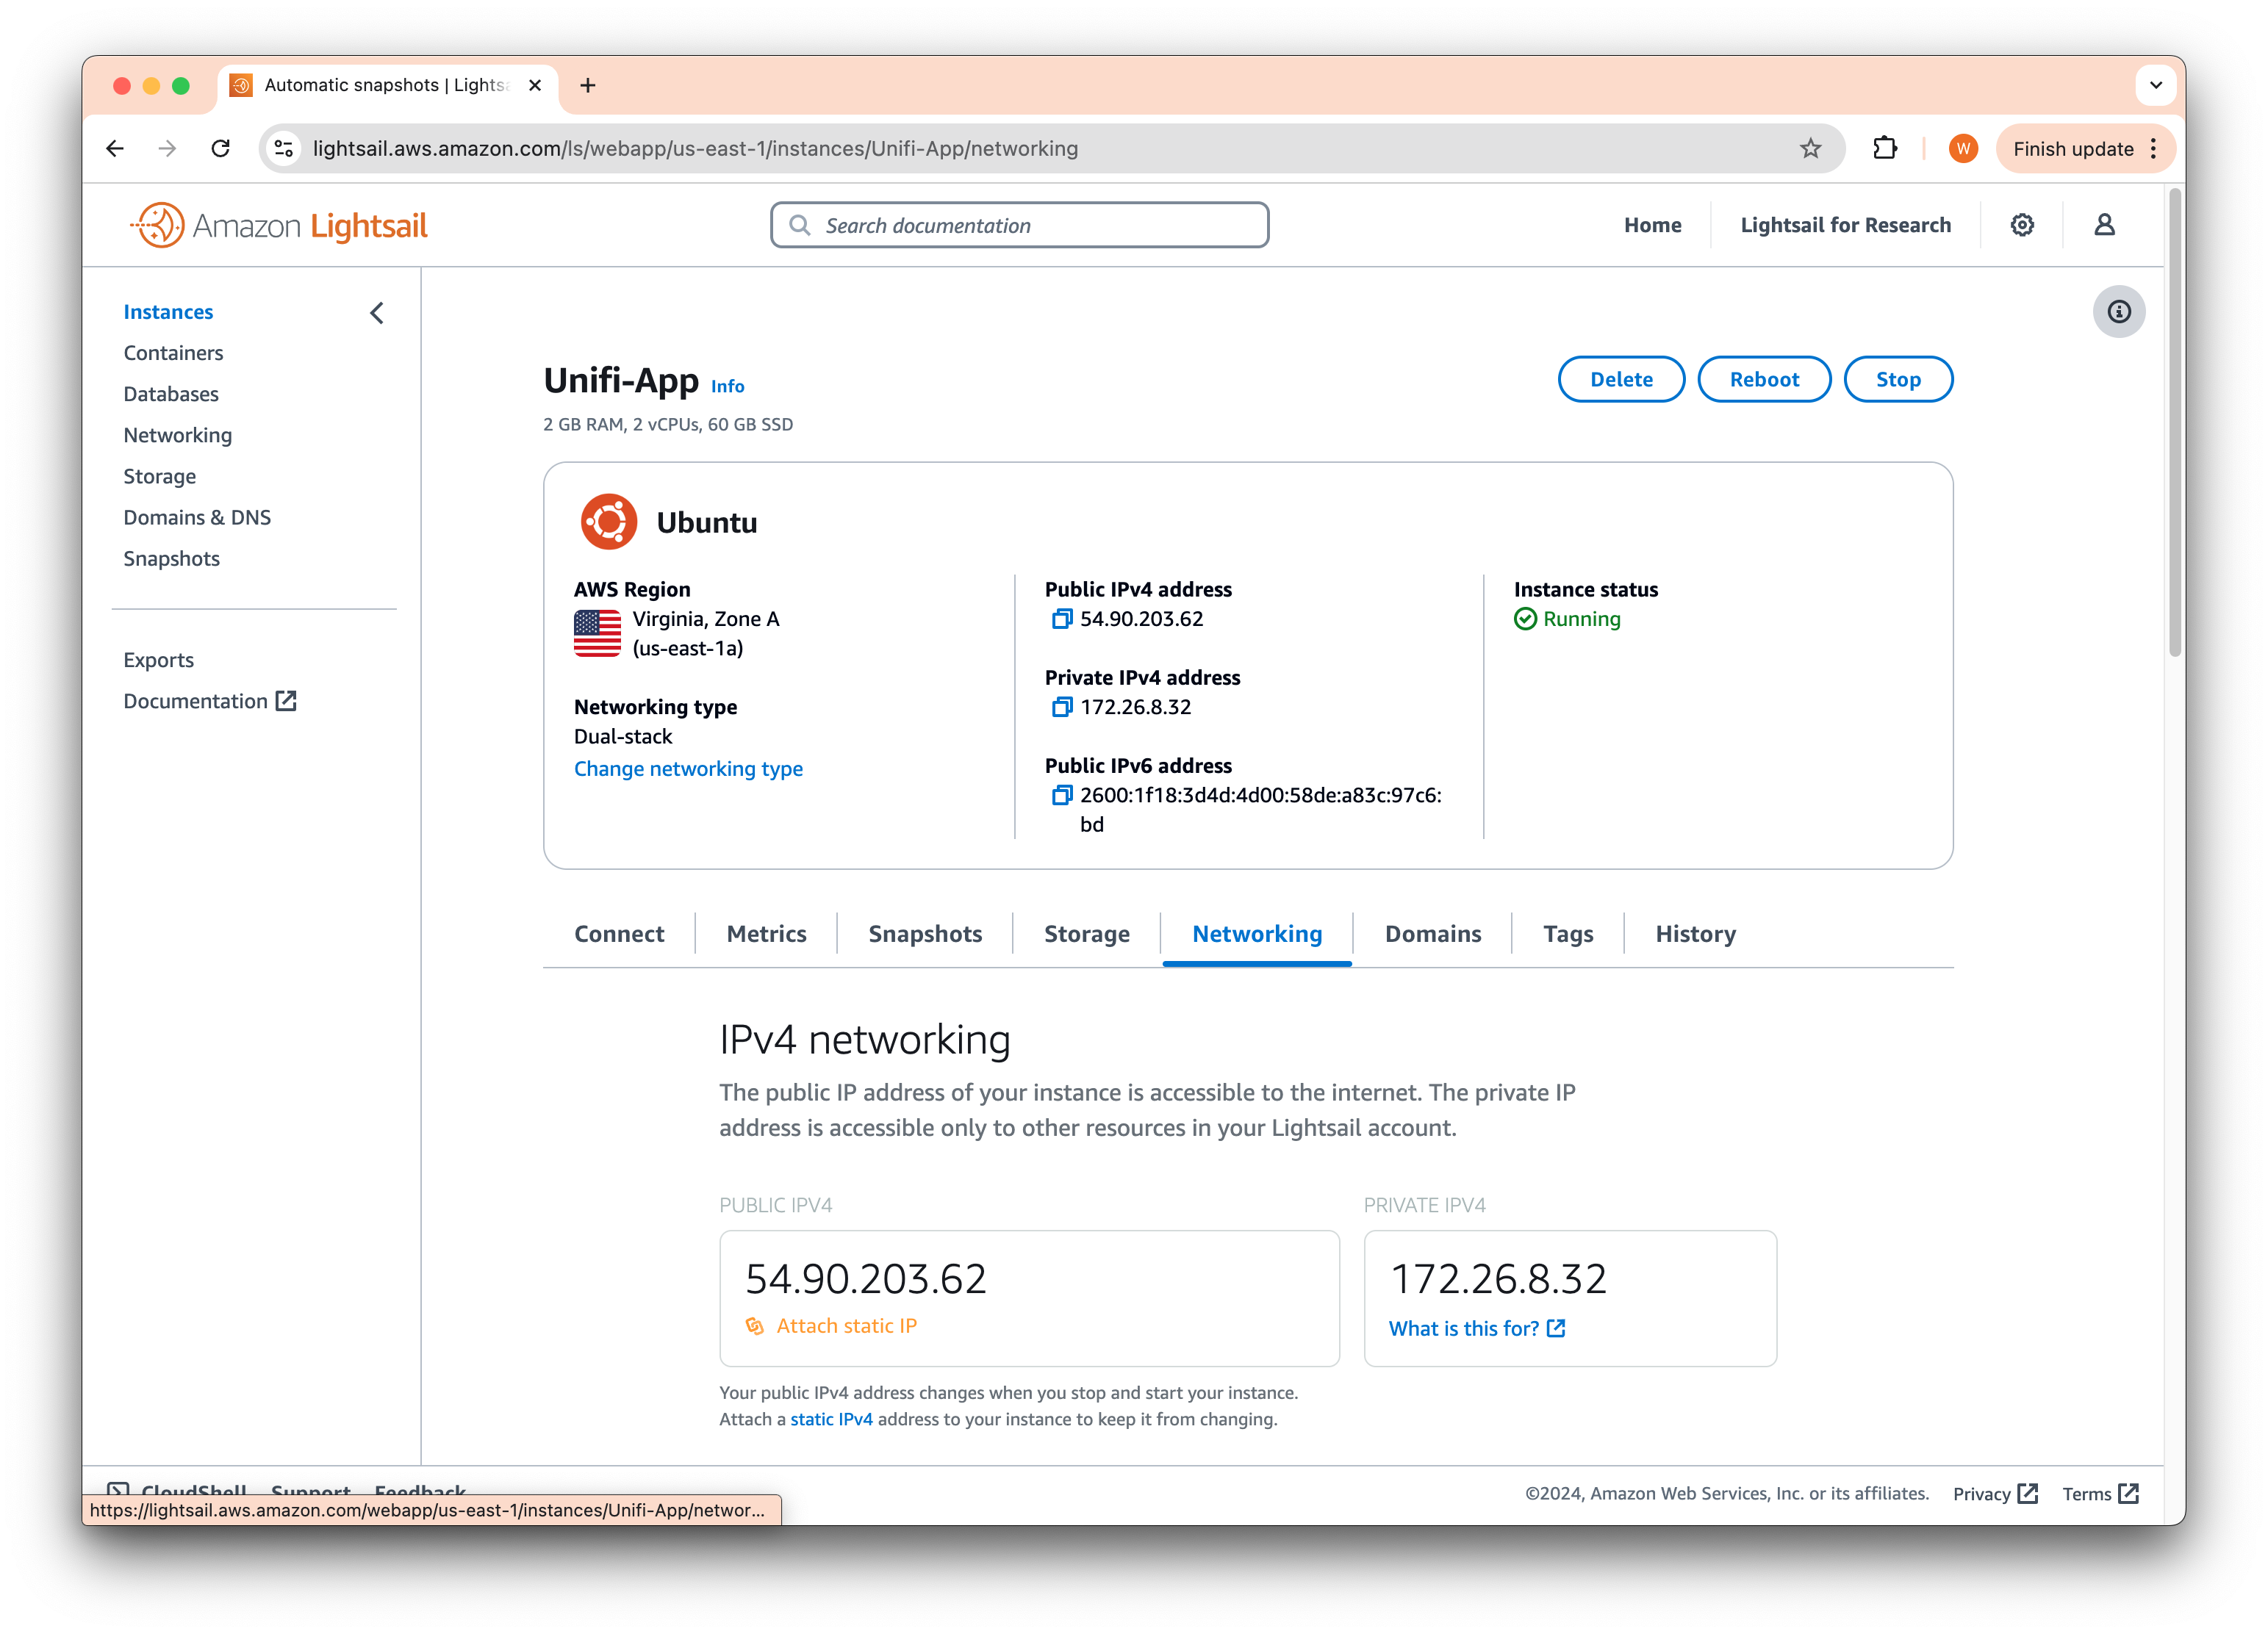
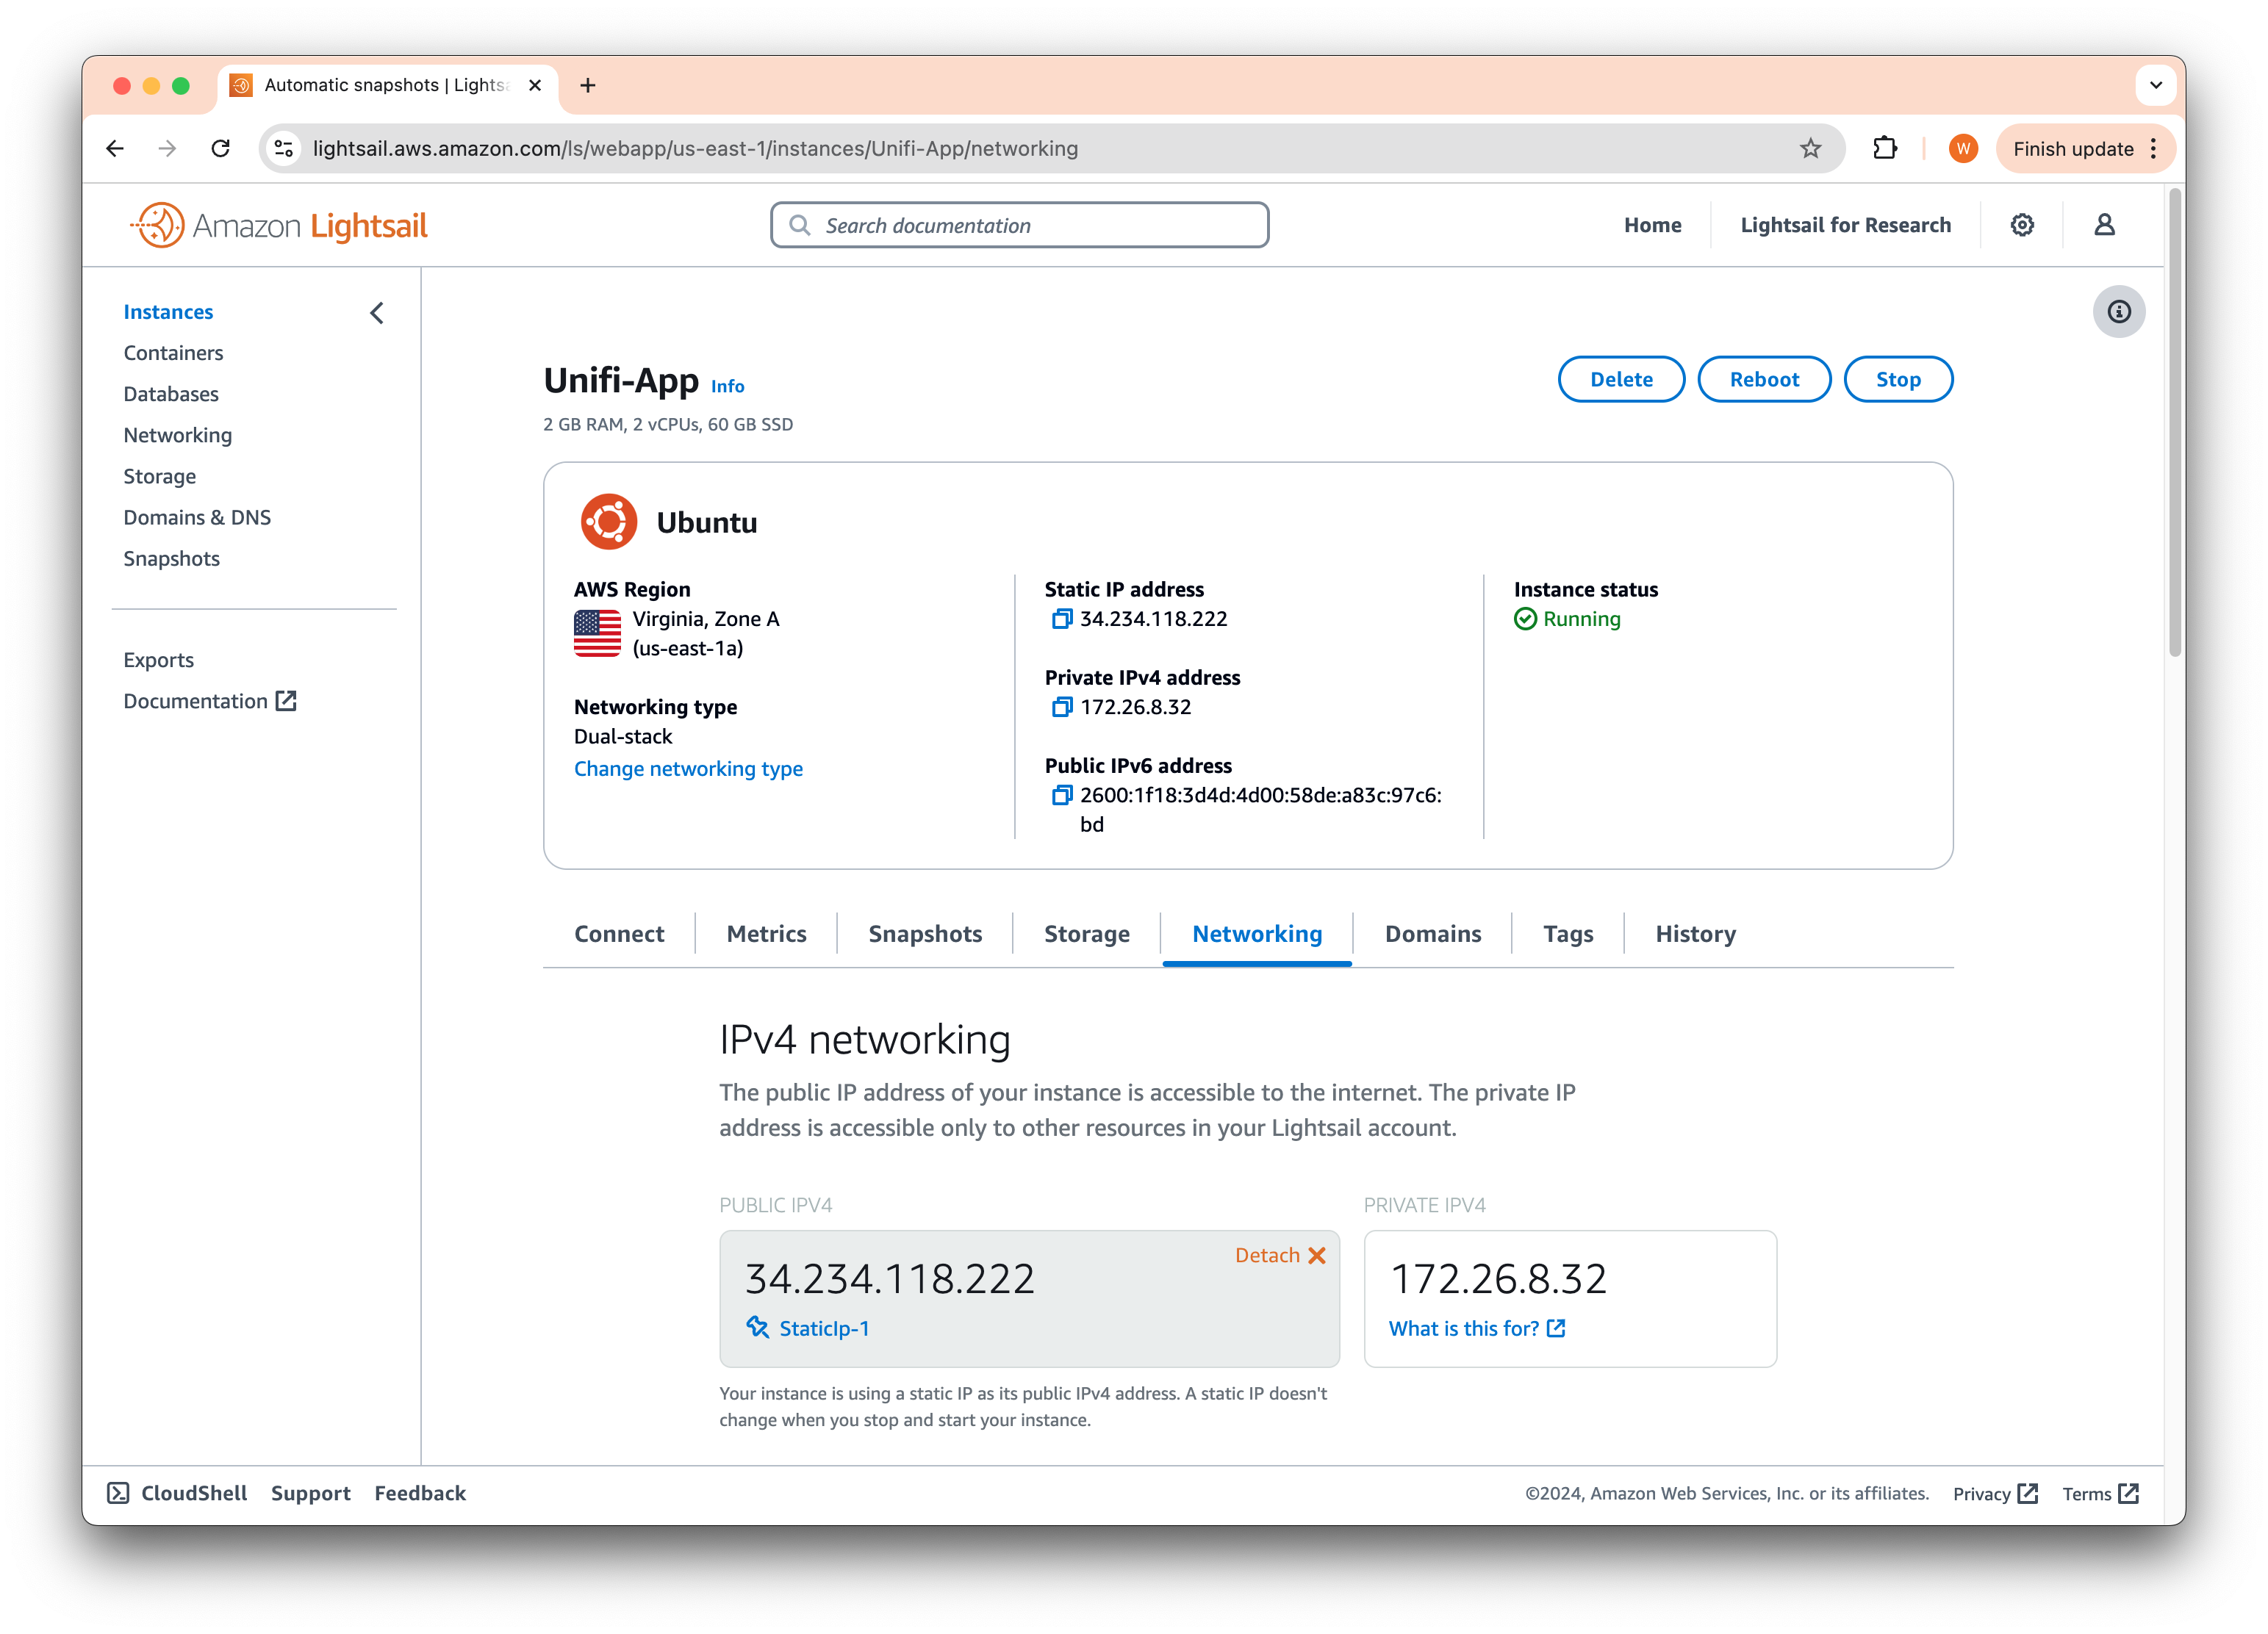
Under the IPv4 networking section, click on Attach Static IP. This will ensure that your IP address remains constant, even after restarting the instance, preventing connectivity issues for your devices. A pop-up should appear, as shown below.
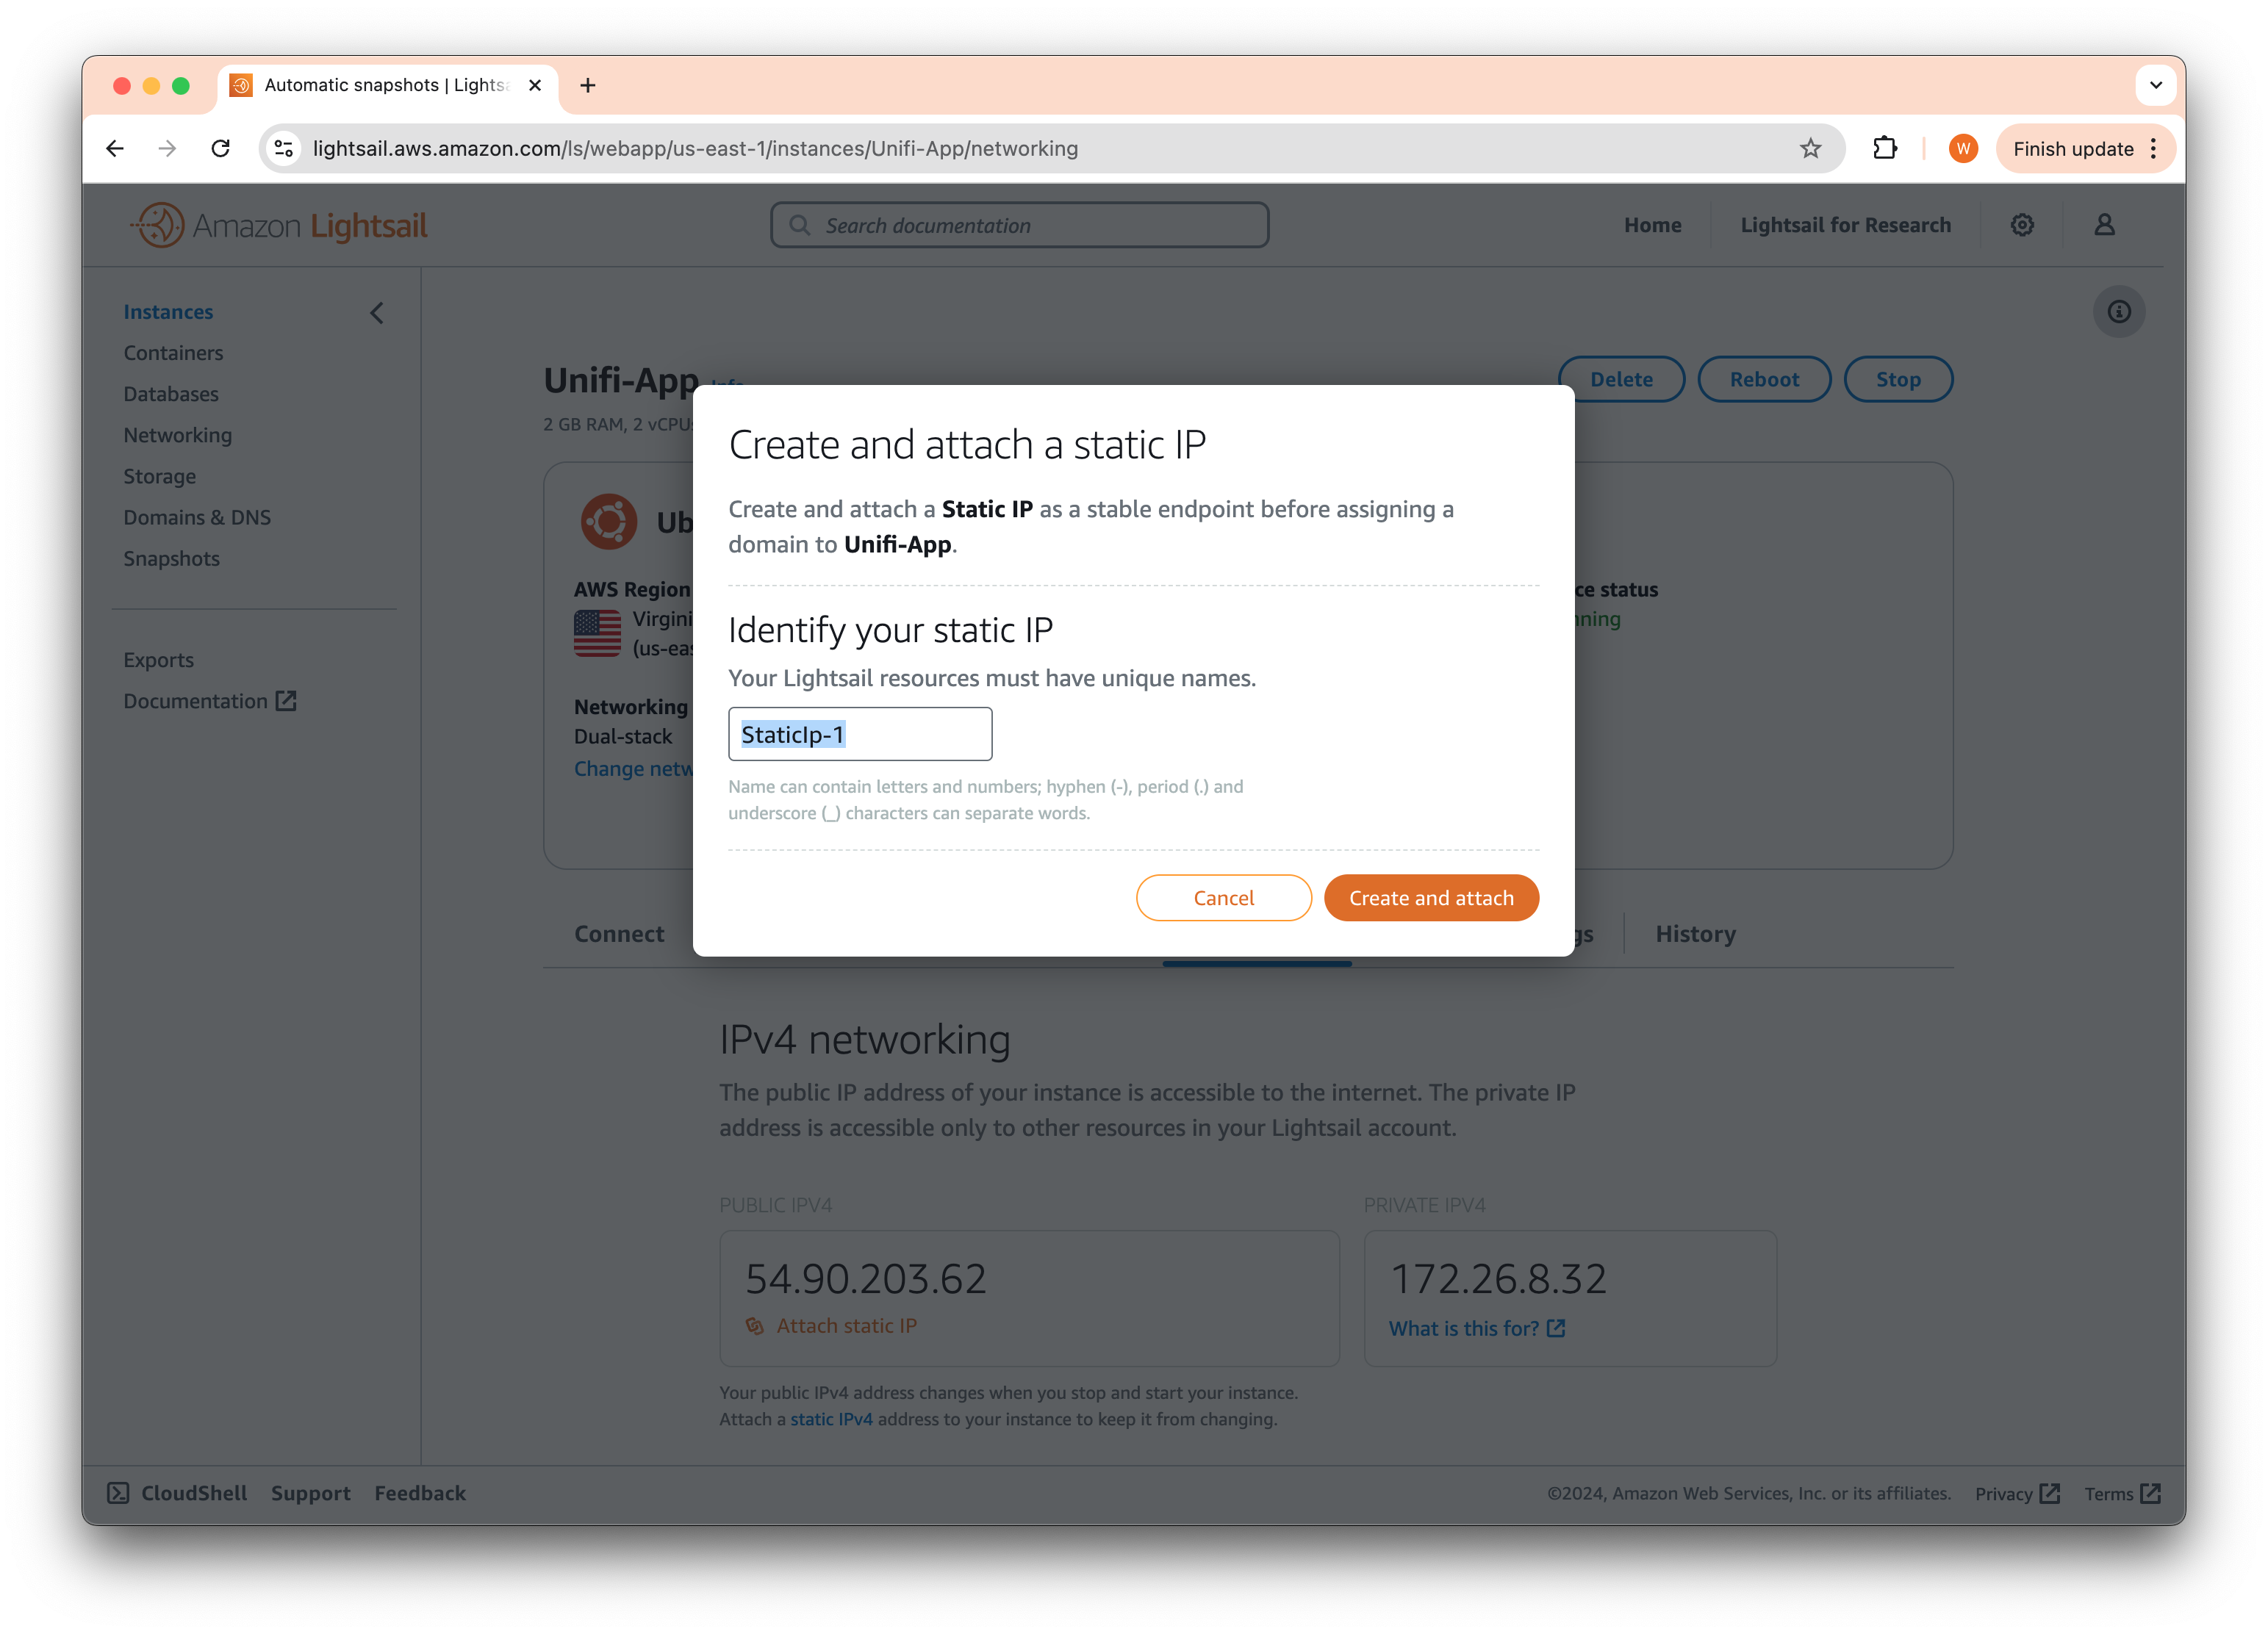
You can leave the name as default and click Create and attach. You should now see the new public IP and the name of the IP below it, you will need this later to connect to the application.
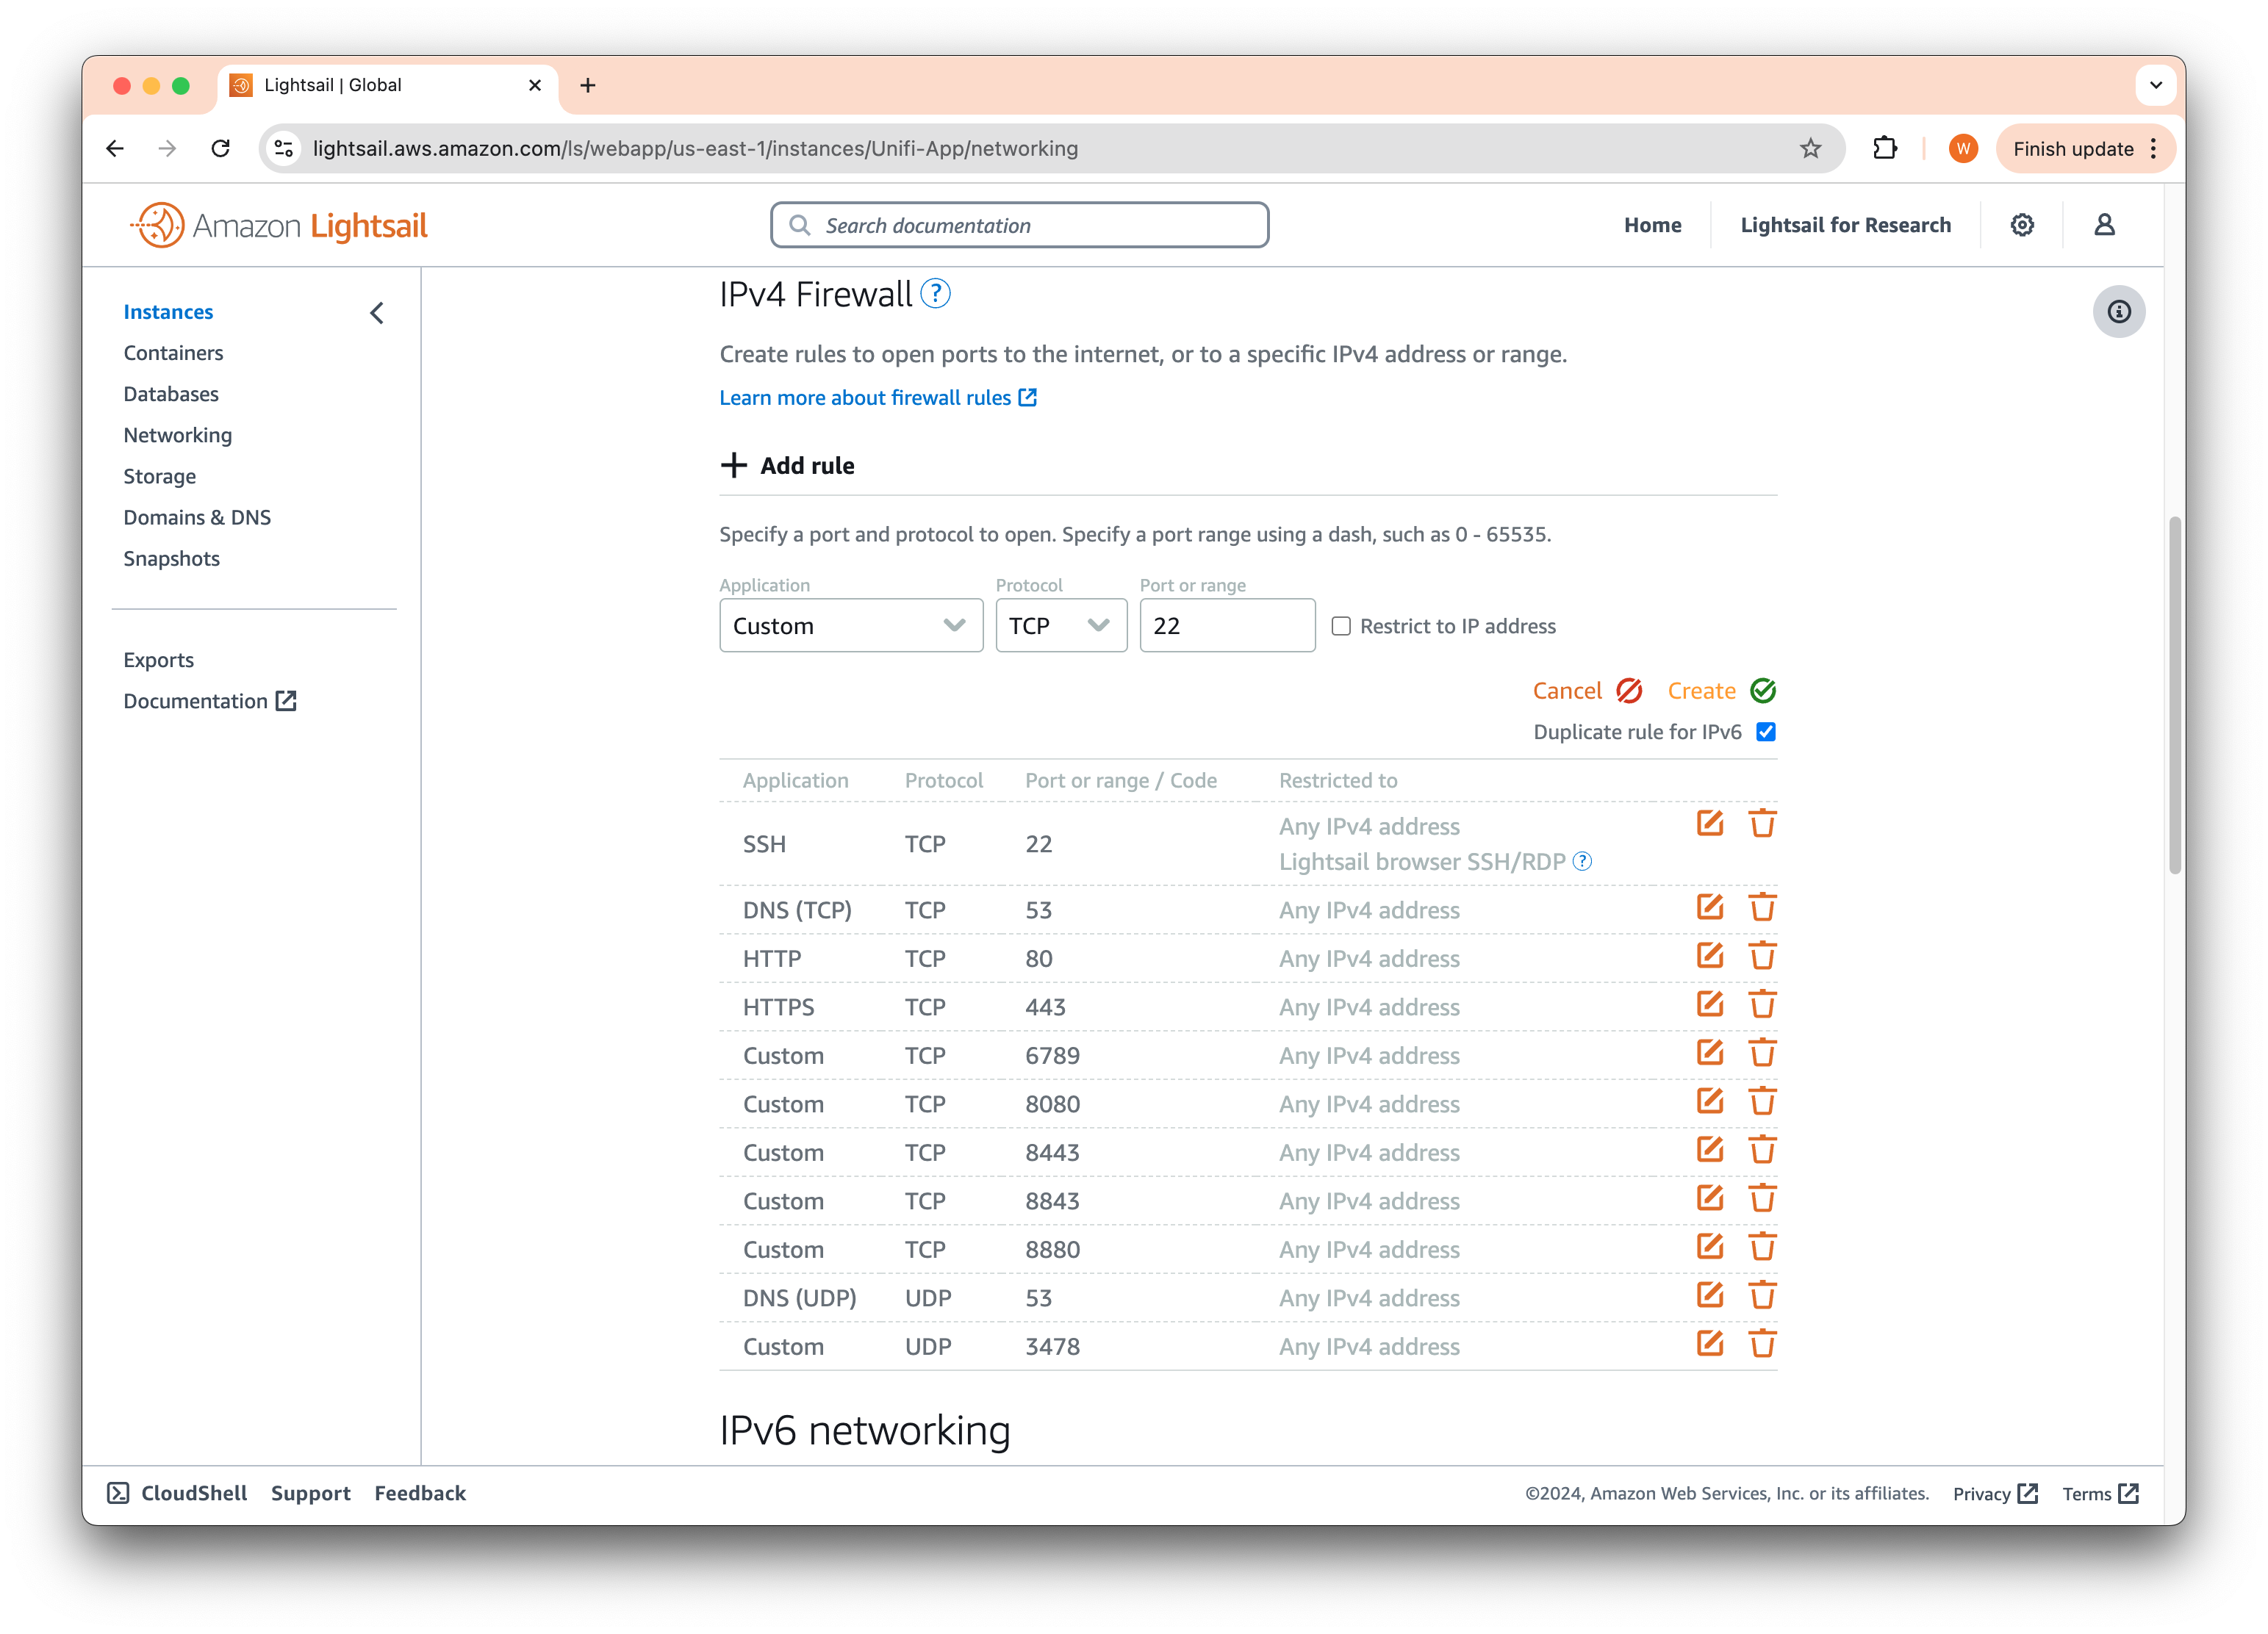
Scroll down the page to the IPv4 Firewall section. Click Add rule, to add the protocol and port combination till you obtain the same list as shown below. These are the essential ports that are required, For the full list of ports, you can check out the required port reference here.
Connecting to your Application/Controller
Congratulations, you’ve reached the final step! Now, open your browser and navigate to https://<your-public-IP>:8443 (for example, https://34.234.118.222:8443) to access the application page.
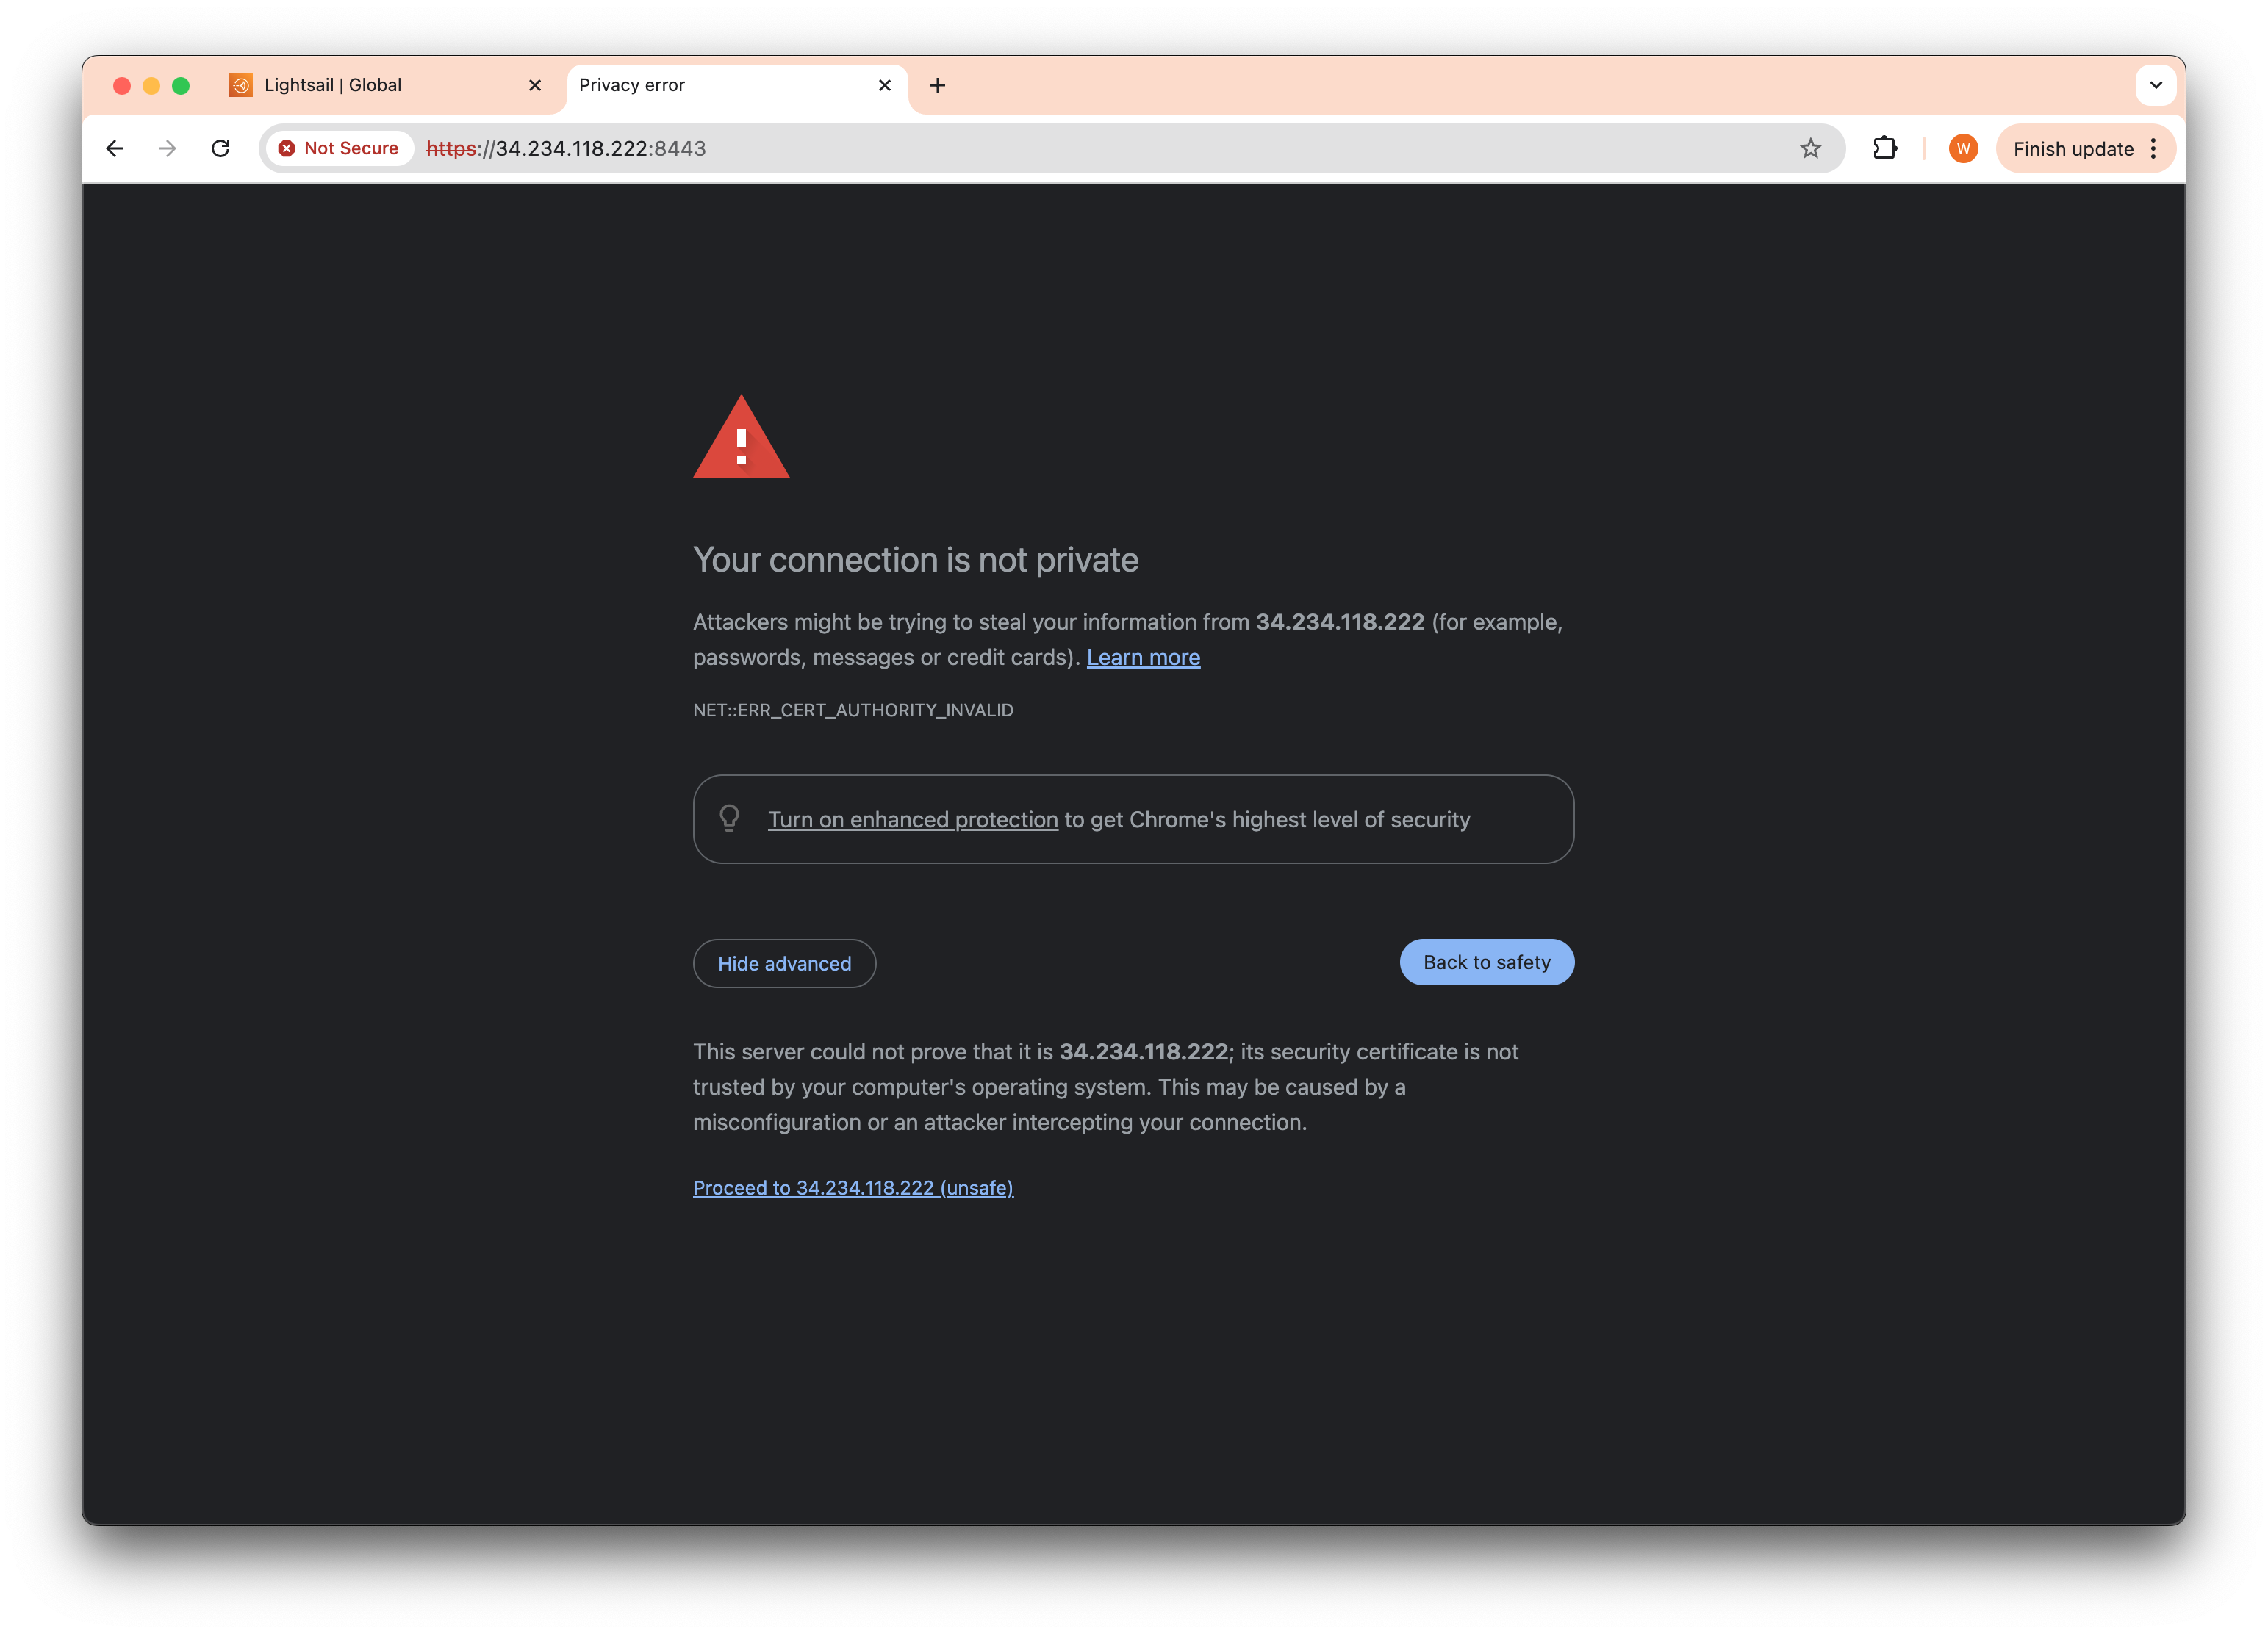
You may see a warning like so, this is fine since the app does not have a certificate that the browser trusts. Click Advanced > Proceed to <your IP> (unsafe) to bypass the warning.
Do not bypass the warning for sites that you do not know/own.
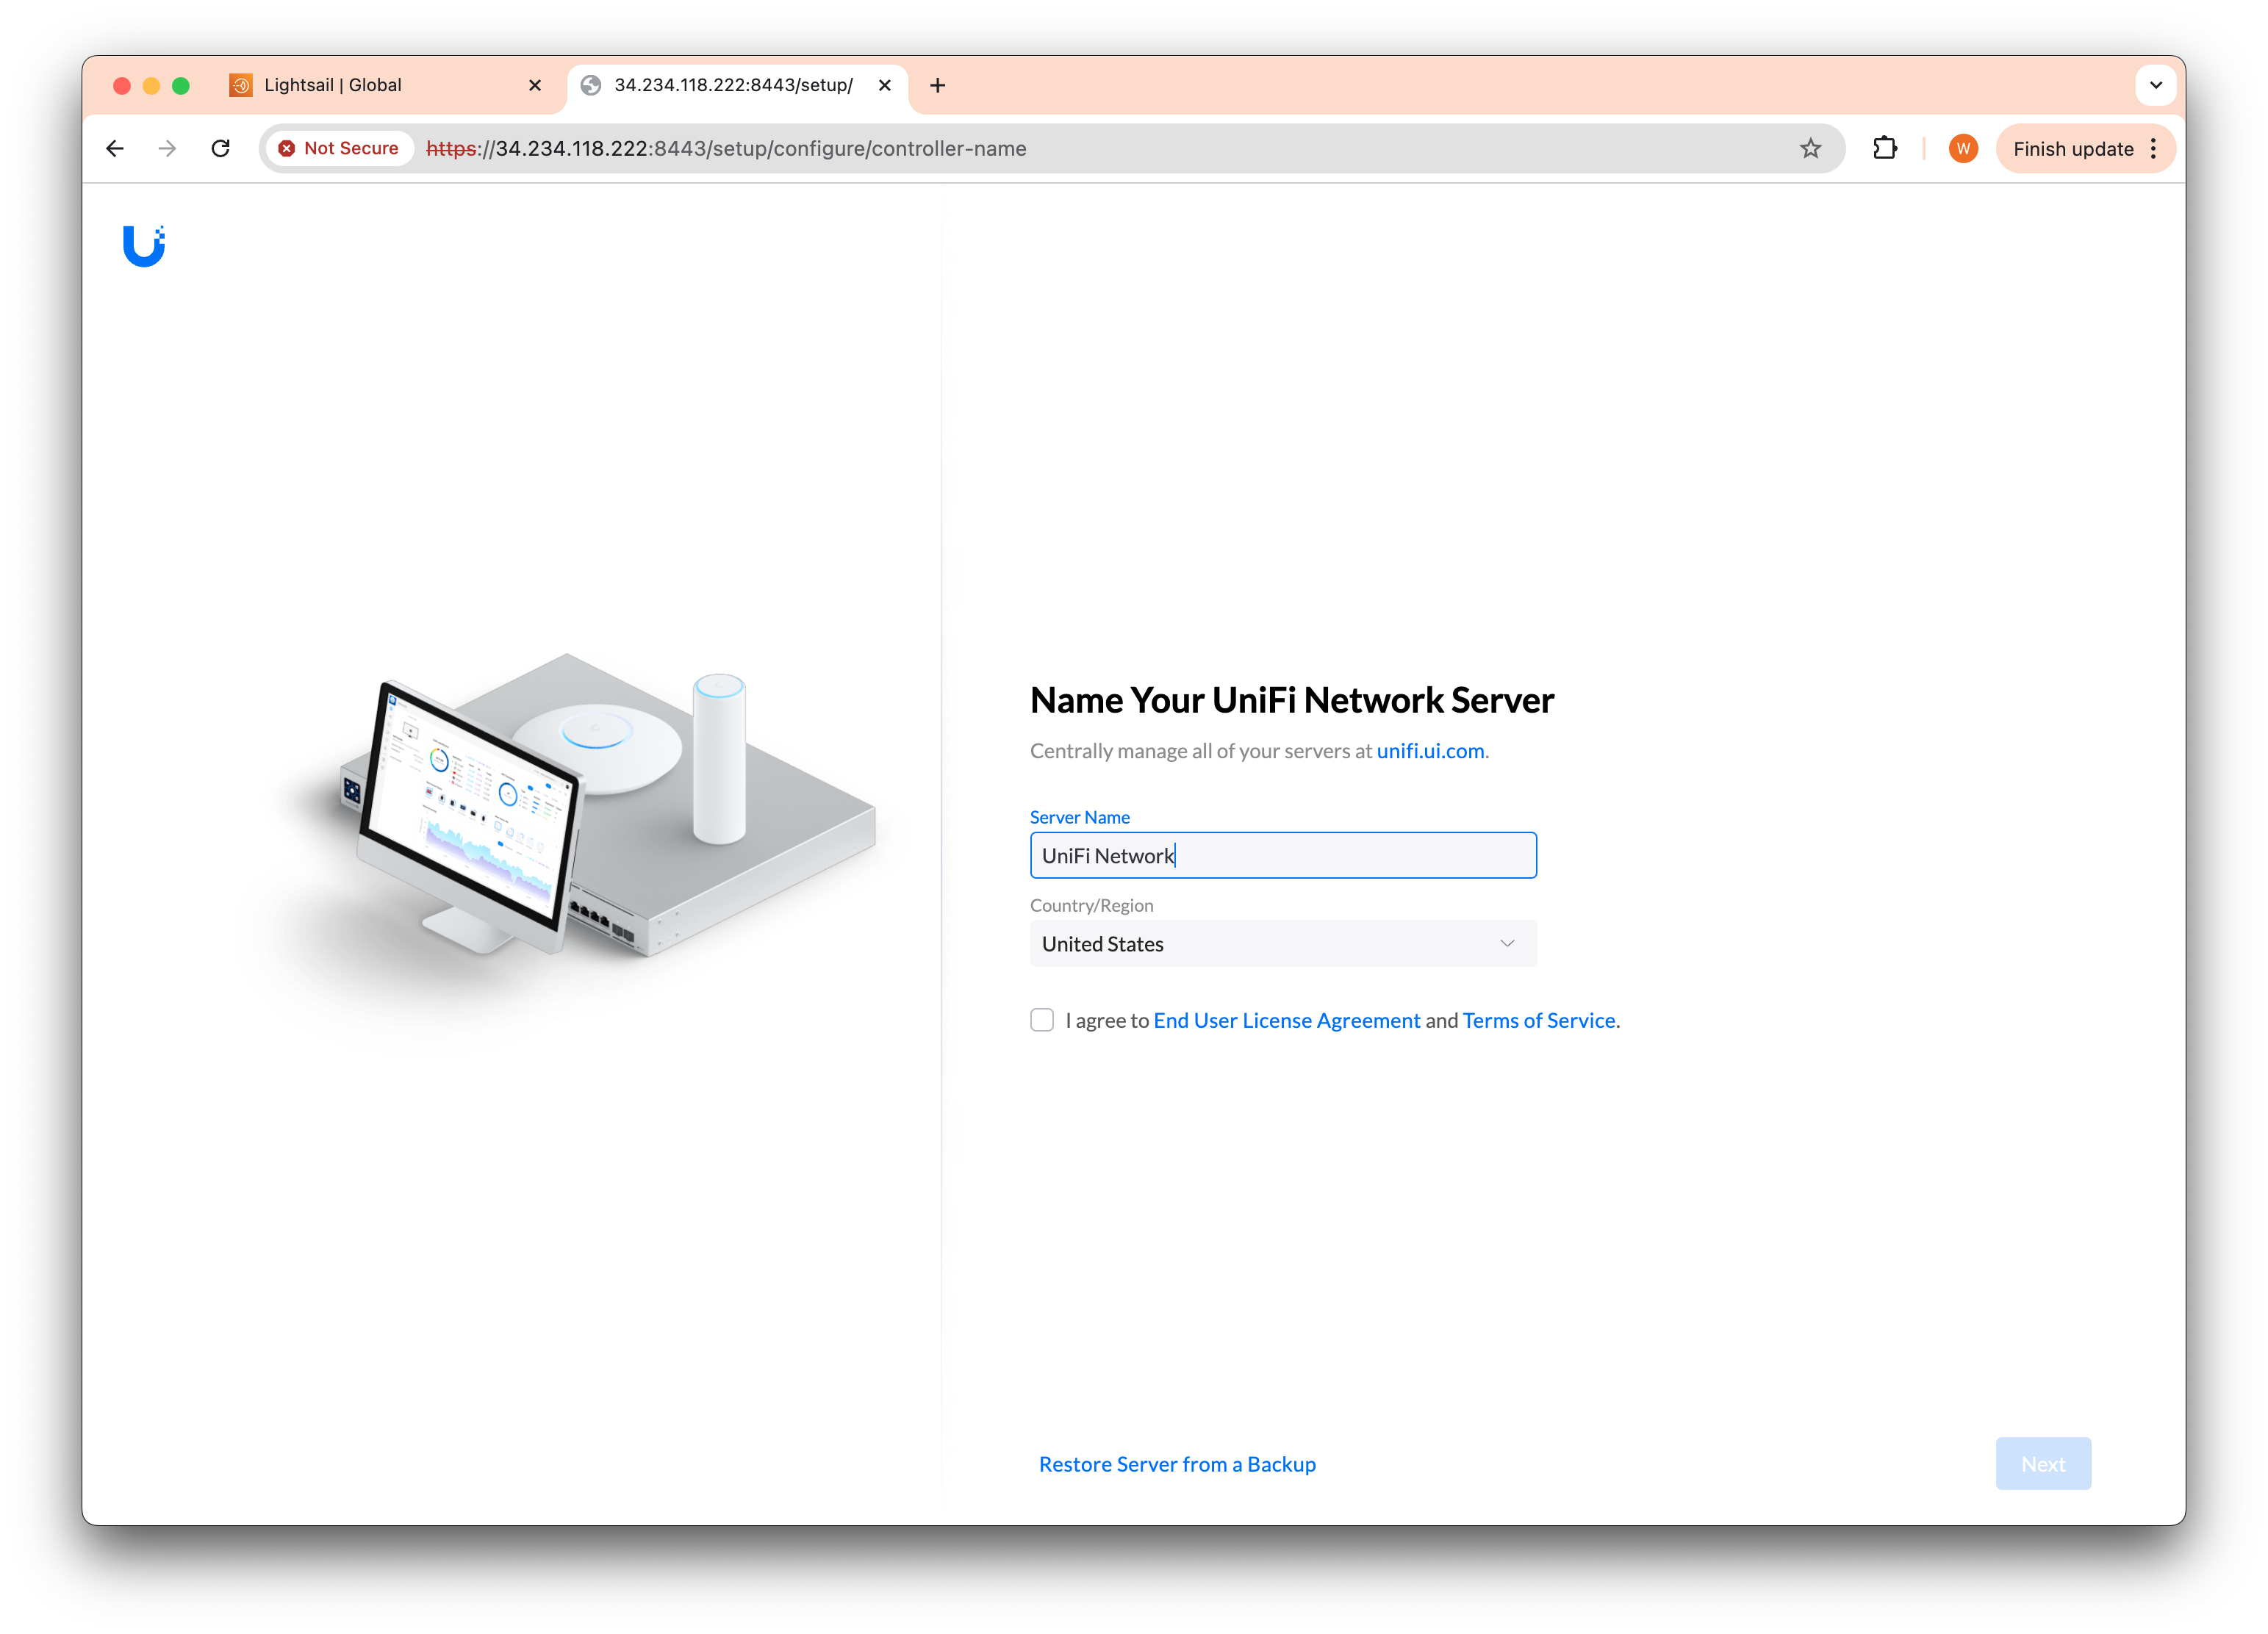
you should now see the setup screen for the Unifi Network Application.
Other considerations
Setting up and running the UniFi Network Application on Amazon LightSail can be a complex process, but you’ve reached the end of this guide with a solid foundation. However, there are still critical aspects to consider, particularly in the area of security. The default certificate provided is not trusted, and the security of your connection between the application and your devices cannot be verified. This may lead to data being compromised. To resolve this, you’ll need to register a domain name and obtain a valid SSL certificate, much like we have done with Uniquely.Cloud, the domain hosting this guide.
Now that your controller is online, it’s crucial to regularly update the application to patch any security vulnerabilities and ensure optimal performance.
If you’re looking for a more convenient option, consider Uniquely.Cloud effortless UniFi Controller Hosting, a turnkey, one-click solution that simplifies the entire process for you. We bundle all essential security with all our plans.
| Provider | Uniquely.Cloud | AWS LightSail |
|---|---|---|
| Installation | One-click | Involved |
| Domain name | Provided | Bring/Register your own |
| Security | HTTPS (TLS) for the control panel and guest hotspot portal | Requires registering a domain and obtaining your own HTTPS (TLS) certificate |
| Provisioning | Easy provisioning with our secure provisioning tool | None |
| Updates | Seamless one-click updates | Involved |
| Costs | From US$13.99/month with domain and certificates | From US$12/month without domain and certificate costs |
In conclusion, by following this guide, you’ve successfully navigated the essential configurations, security measures, and performance optimizations needed to leverage Amazon LightSail’s cloud environment. Congratulations on taking this significant step toward enhancing your network management capabilities!

